
Introduction
Are you ready to solve your first-ever Rubik’s Cube? We’ve developed an 8-step solution that’s simple yet effective. This guide contains easy-to-follow diagrams, vivid examples, and easy-to-remember mnemonics. Get ready to solve one of the most exciting puzzles in the world! Once you’ve read the article, you can test yourself with our Rubik’s Cube Quiz!
If you want a little more reassurance that the Rubik’s Cube can be solved, remember that at the time of writing, the world record solve time stands at a staggering 3.13 seconds!
Continue reading to learn more about the Rubik’s Cube, or go straight to Step 1 now!
Table of Contents
Understanding the Rubik’s Cube
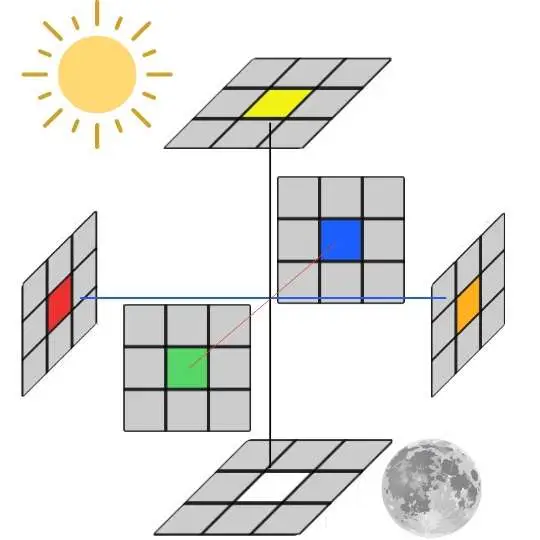
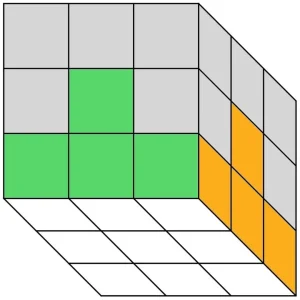
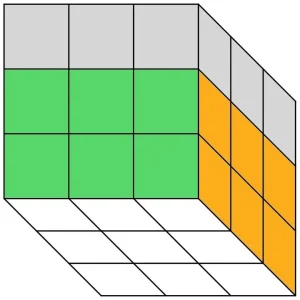
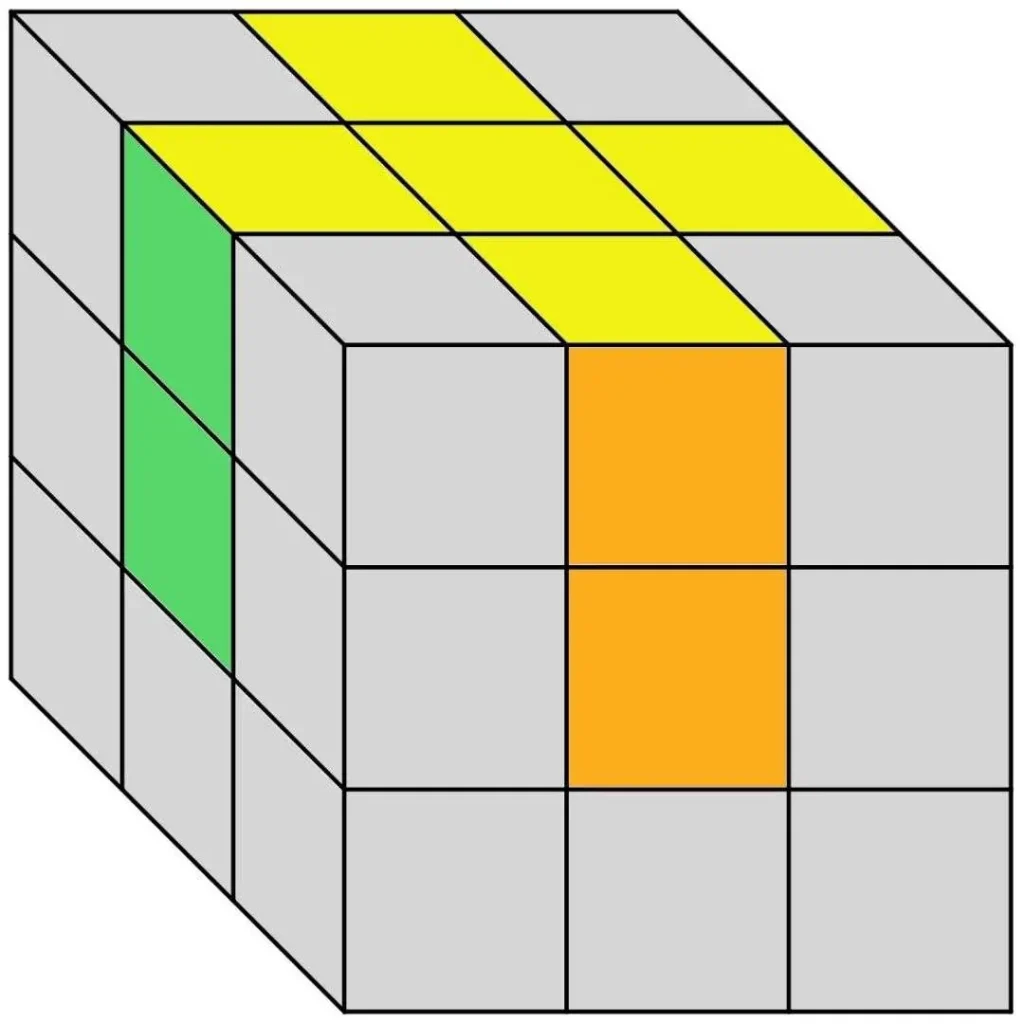
The Rubik’s Cube has six faces, each with a different coloured sticker at its centre. These colours come in pairs (see Figure 1): blue-green, red-orange, and yellow-white.
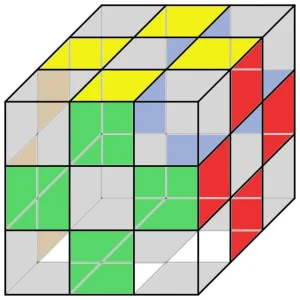
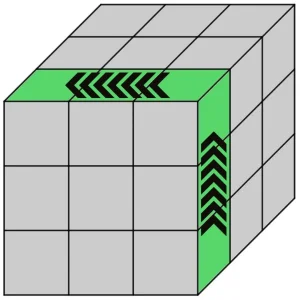
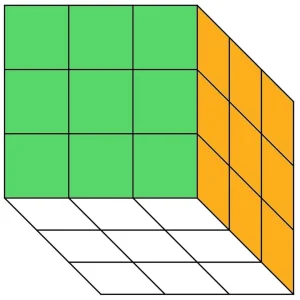
No matter how we scramble the Rubik’s Cube, the centre stickers never change position. Only the edge and corner pieces will move (see Figures 2-3). This observation is the basis for our strategy.

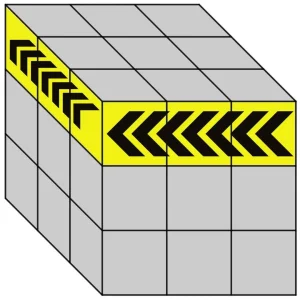
Arrow diagrams, like Figures 4-7, are found throughout the article. They tell you which face of the cube to turn in and in which direction. The colours on the arrow diagrams don’t mean anything; they just make the article a bit brighter!
You will complete the Rubik’s Cube in eight steps with three checkpoints (see Figure 8). First, we complete the bottom layer, then the middle layer and finally, the top layer.
Solving the Rubik’s Cube
The Bottom Layer
Step 1: Making the Daisy
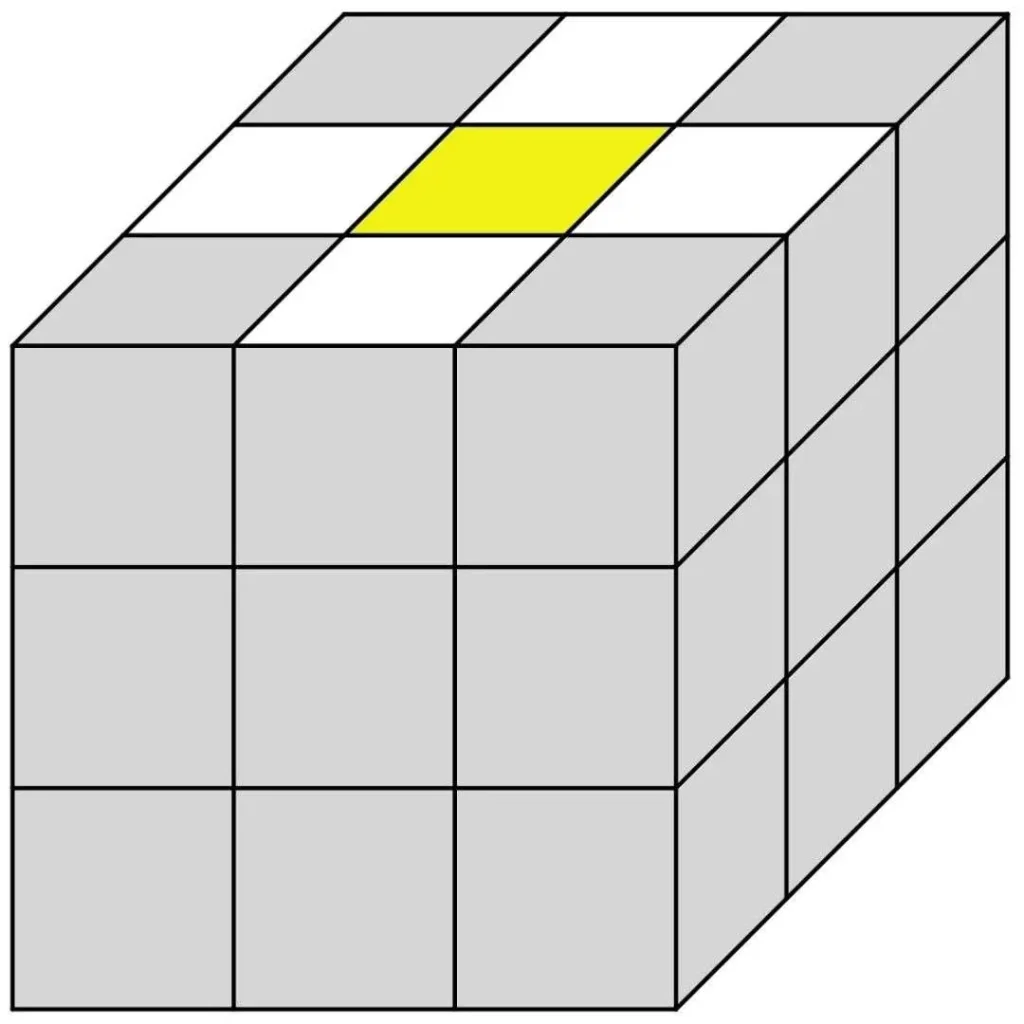
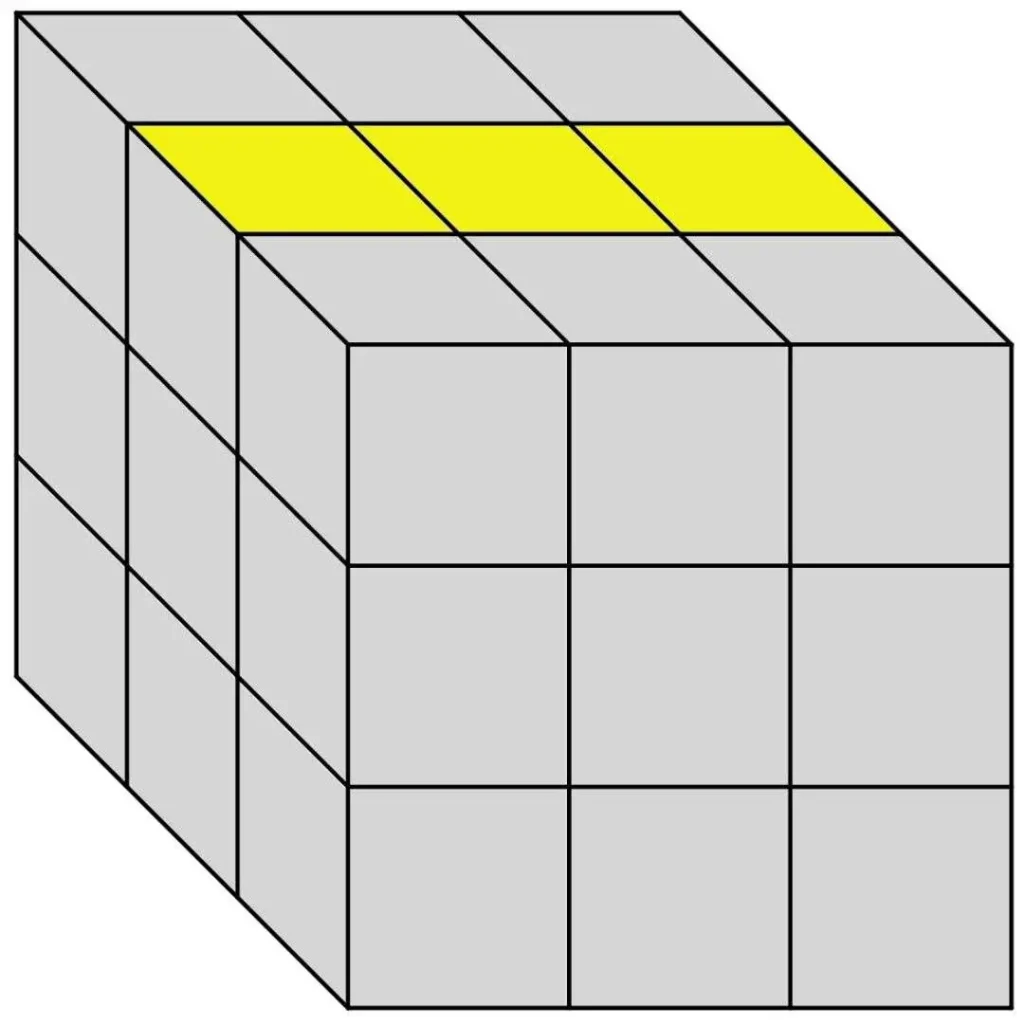
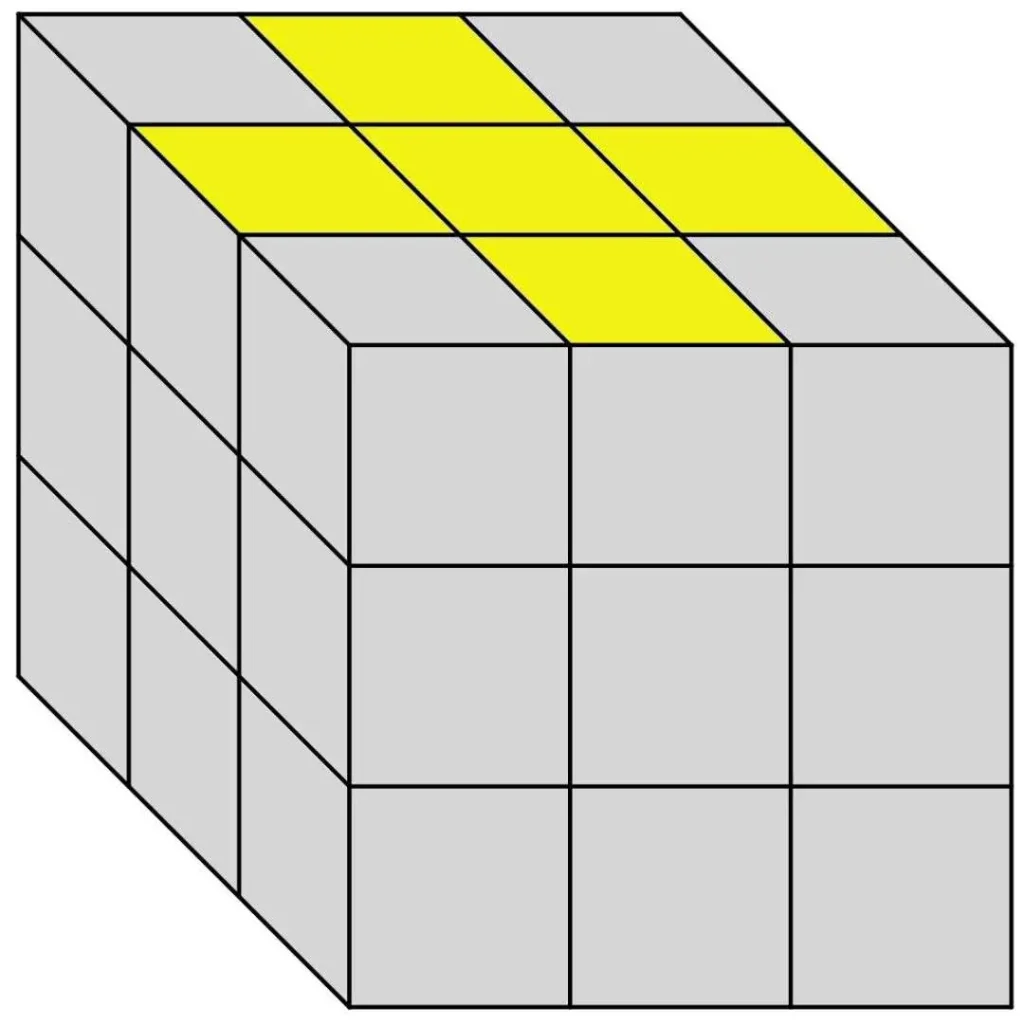
Goal: Position the four white edge stickers on the yellow face to form a Daisy (see Figure 9).
Begin by locating the white edge stickers. The goal is to move these petals to the yellow face. It’s a challenge, but try doing this step yourself first.
For help, look at Figures 10-11 and pay attention to the yellow arrow diagrams. Their job is to make sure any petals already in the correct position are not disturbed.
Example 1

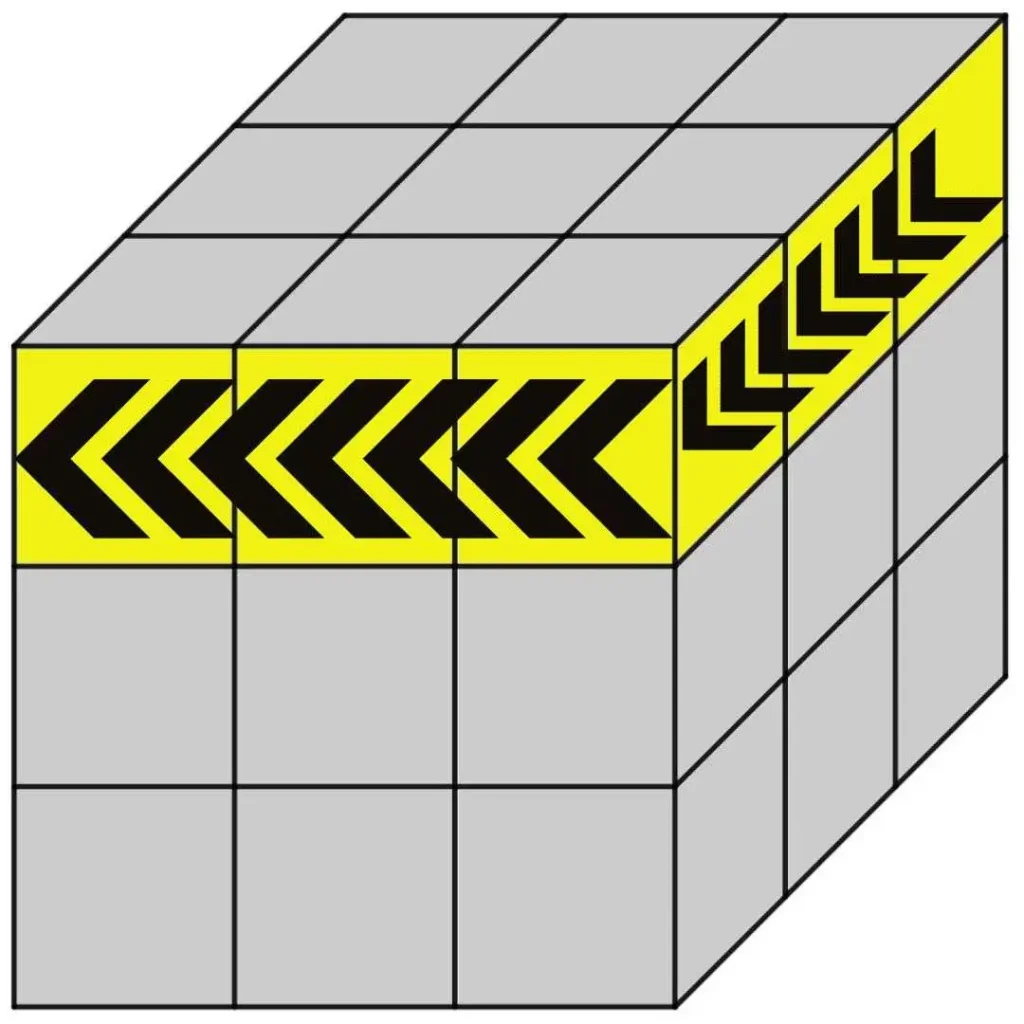
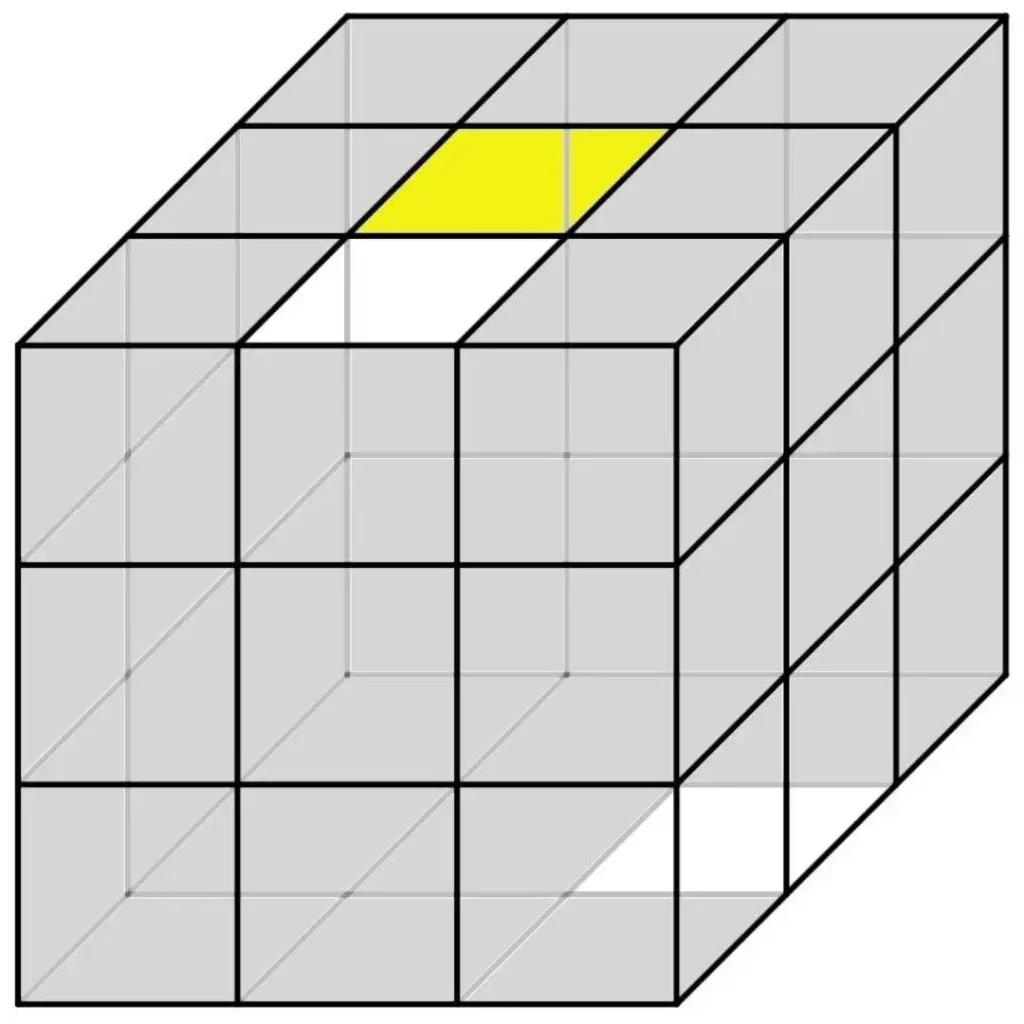

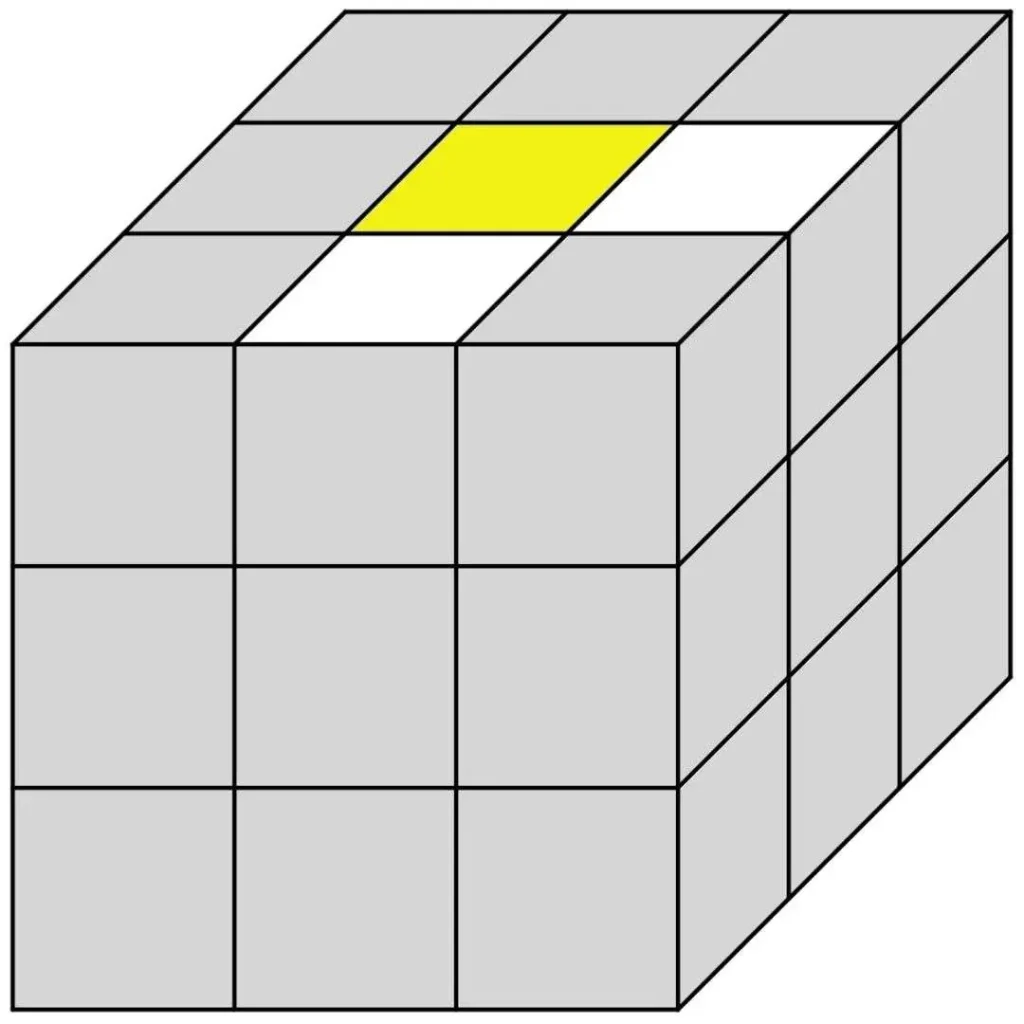
Figure 10: Making a well-timed turn of the top row so the second petal does not disturb the first petal
Example 2

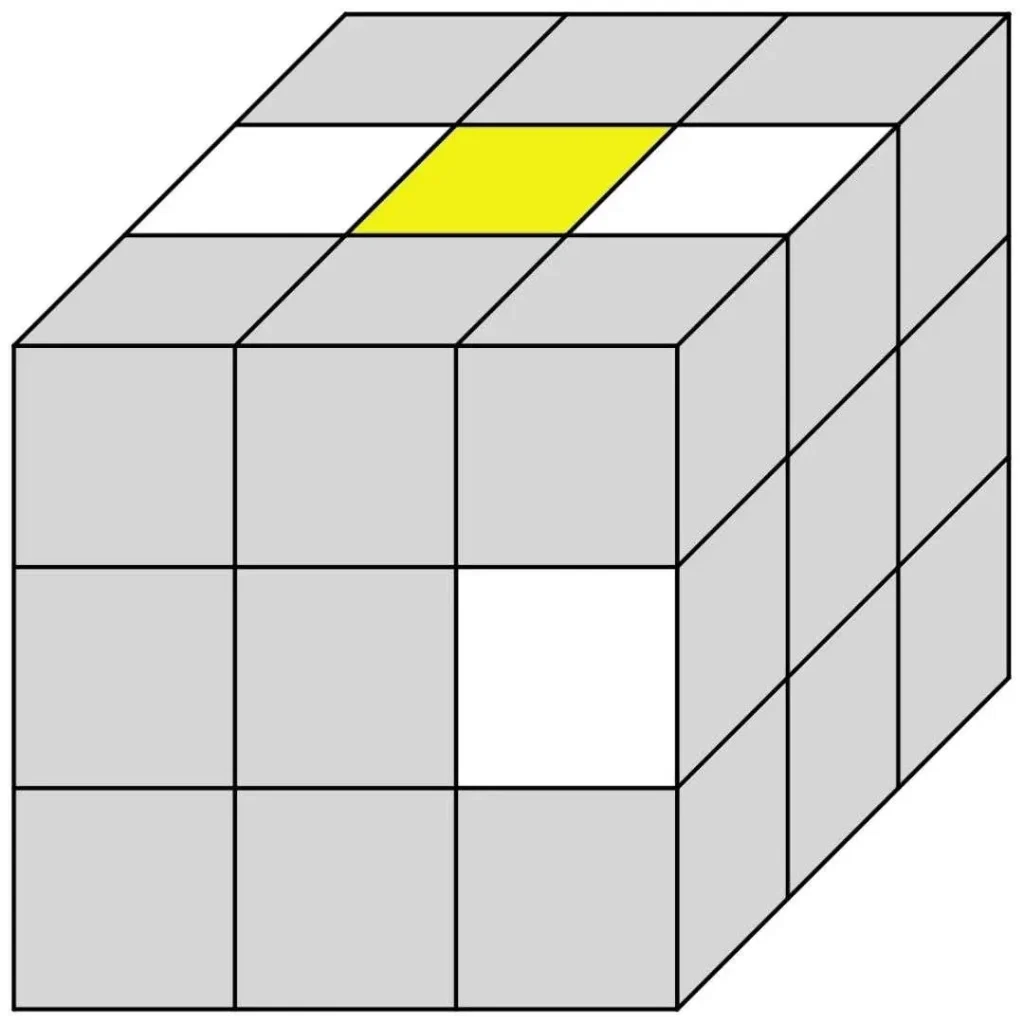
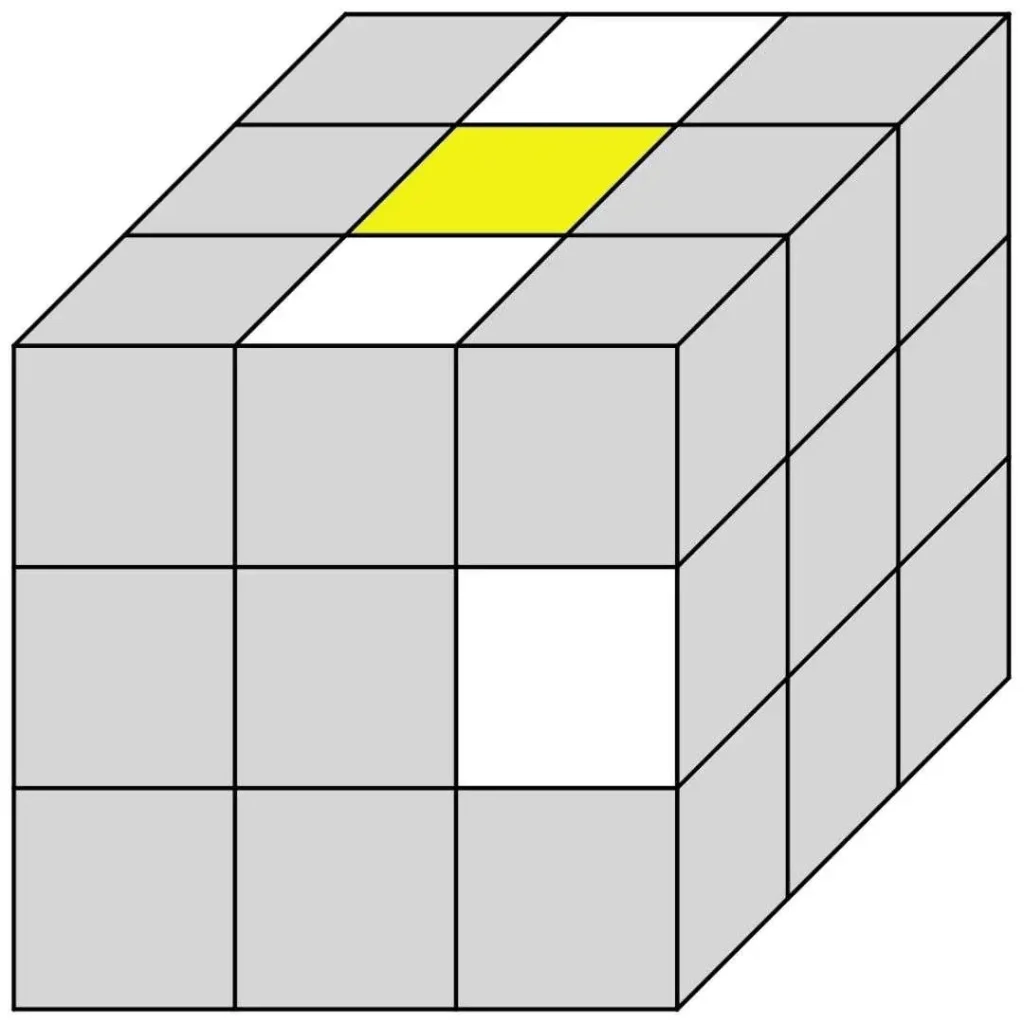
Figure 11: Each new petal is trickier to get to the top row as there are more petals to protect
Step 2: The White Cross
Goal: Transfer the white petals to the white face, aligning them to form a cross (see Figure 12).

Each white petal shares an edge with another coloured sticker. Align that sticker with the face of the same colour. Then, turn the petal down to the white face. Repeat this for all four petals. By the end, you’ll have your white cross, a significant milestone! See Figure 13 for an example.
Example
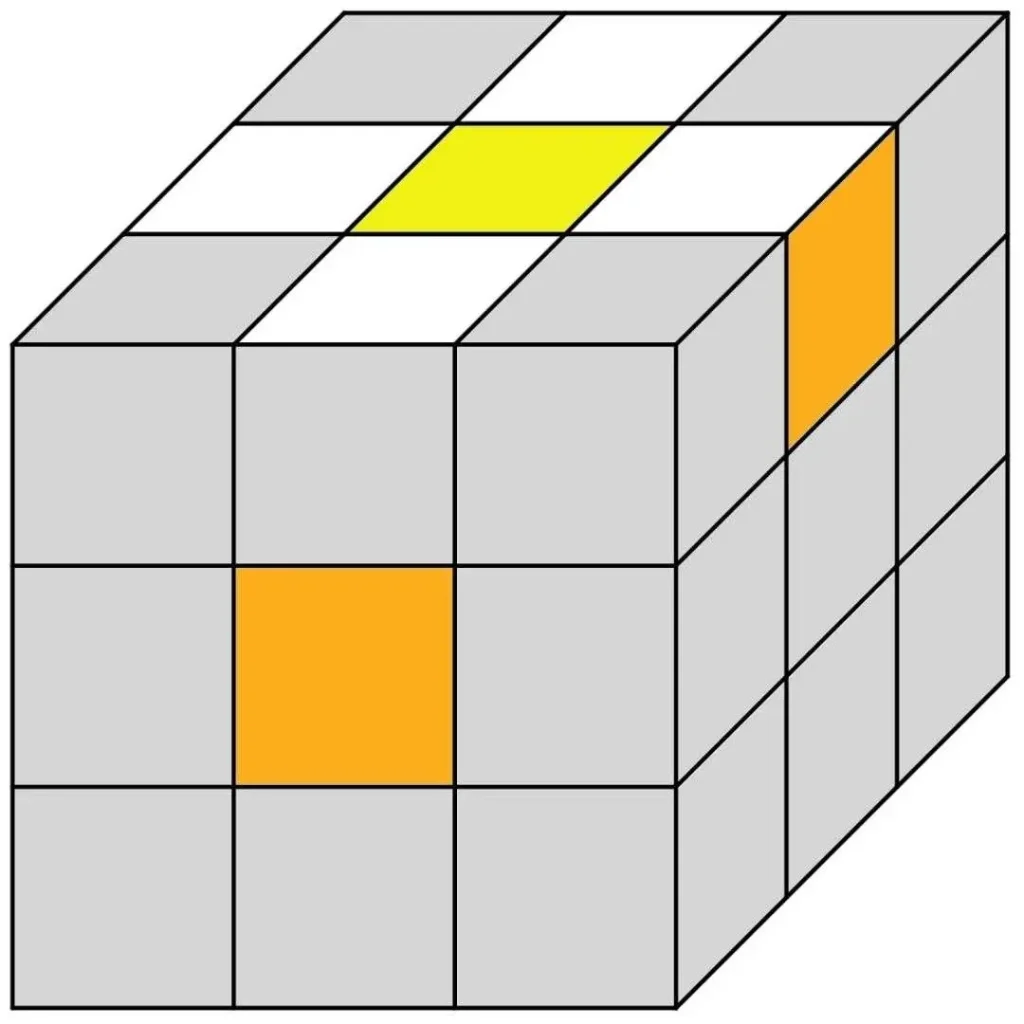

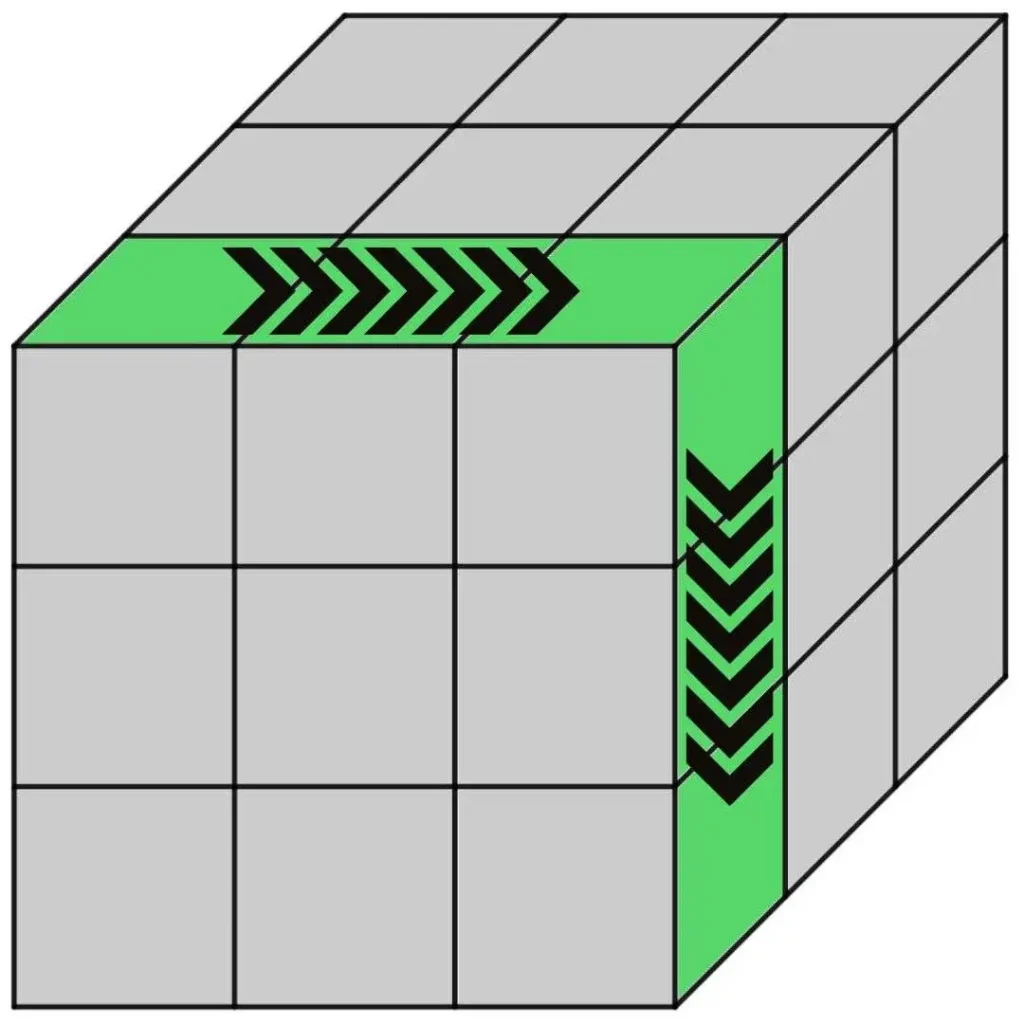
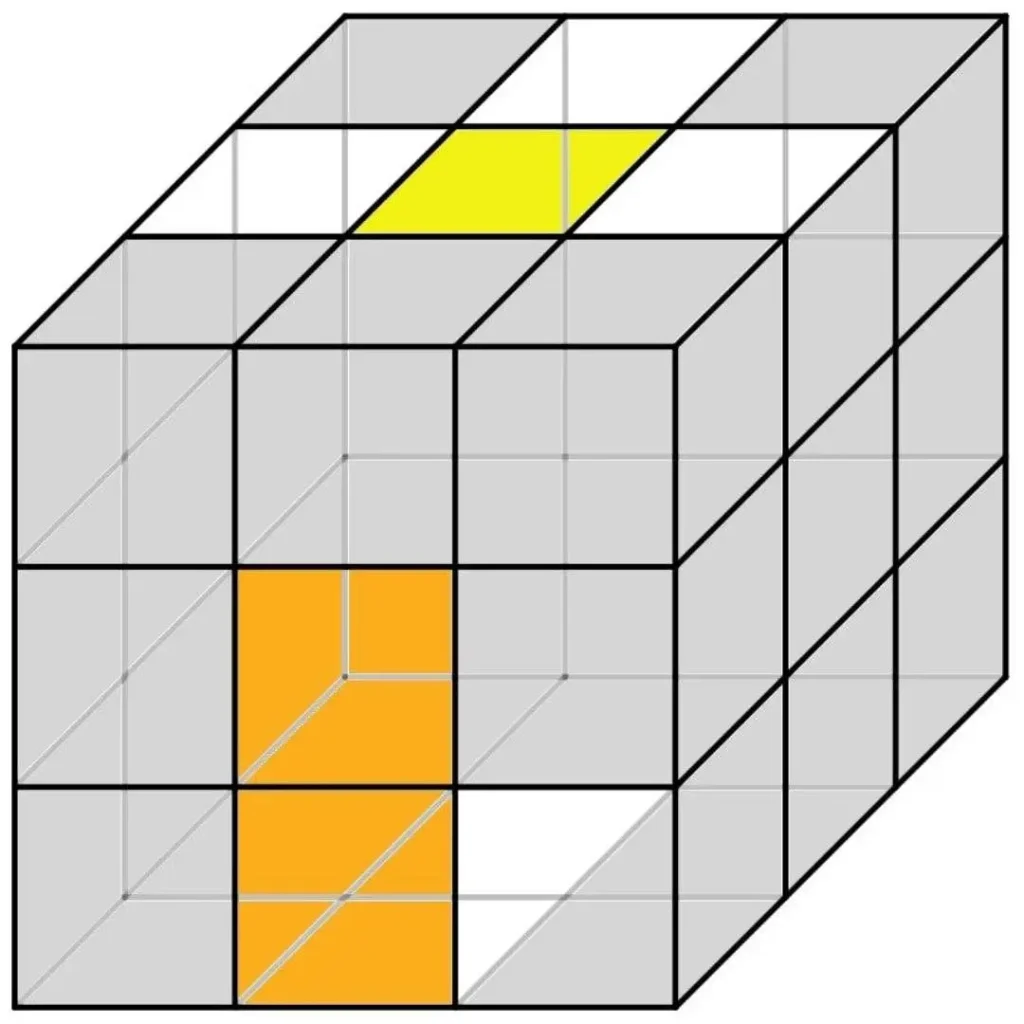
Figure 13: Correctly align petal and transfer it to white face
Step 3: The Petal-Hunting Birds
Goal: Complete each corner of the bottom layer of the Rubik’s Cube using Petal-Hunting Birds and Triggers.

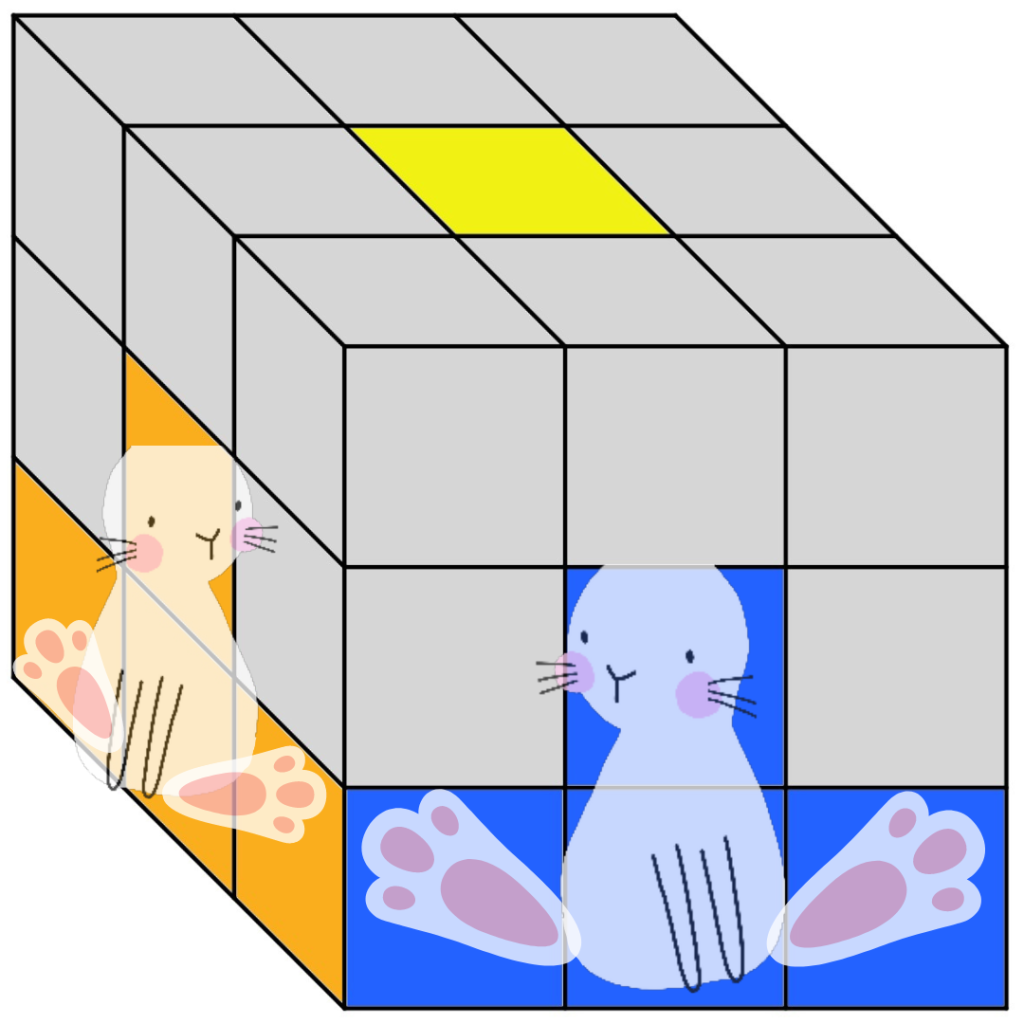
At this stage, you’ll see the feet and bodies of the petal-hunting birds! (See Figure 15).
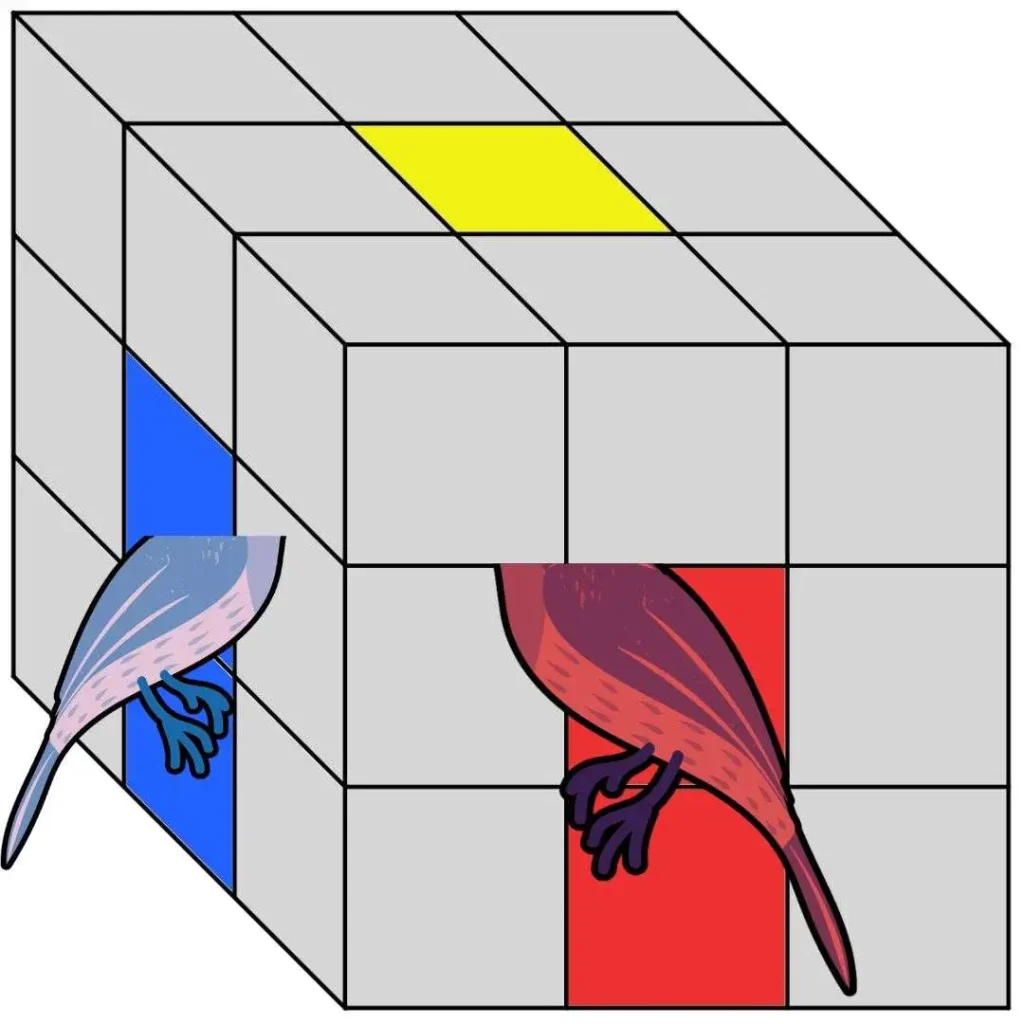
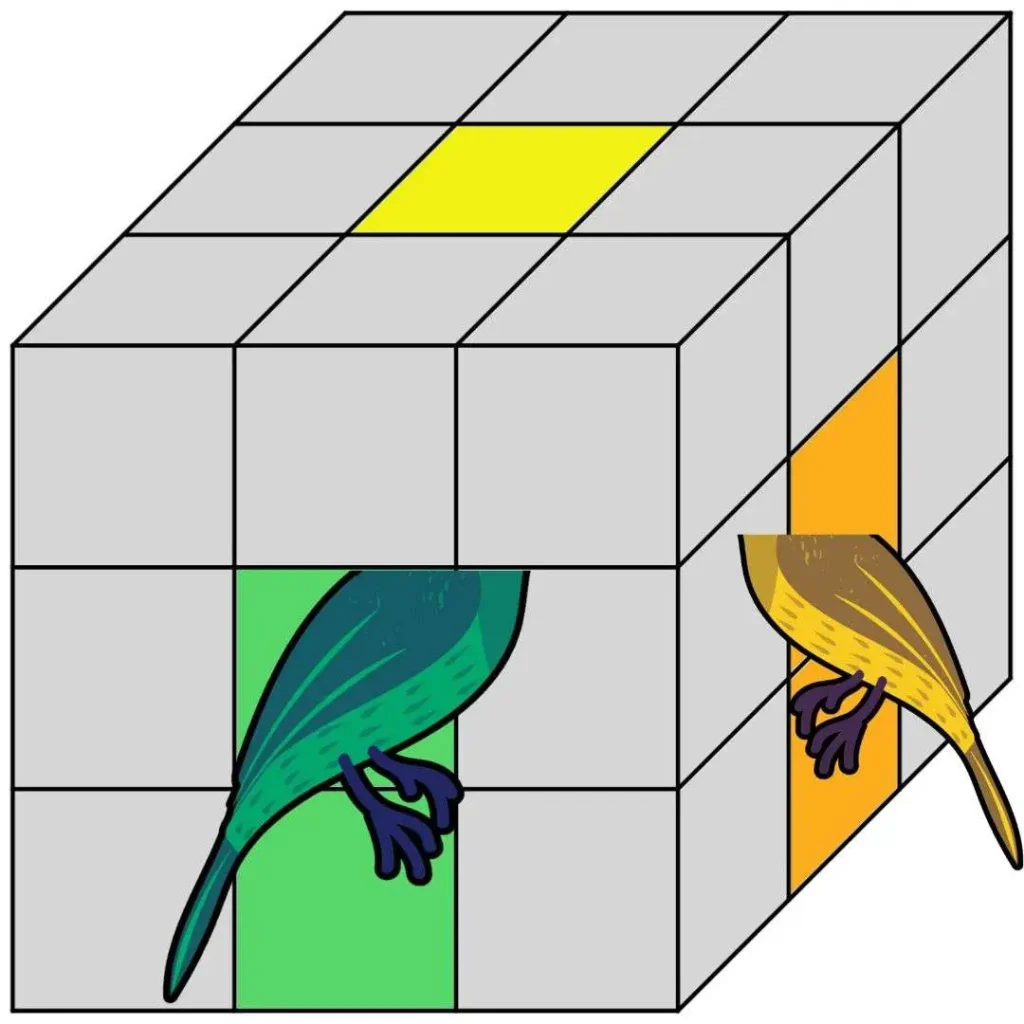
Figure 15: These colourful petal-hunting birds are missing their heads and petals!
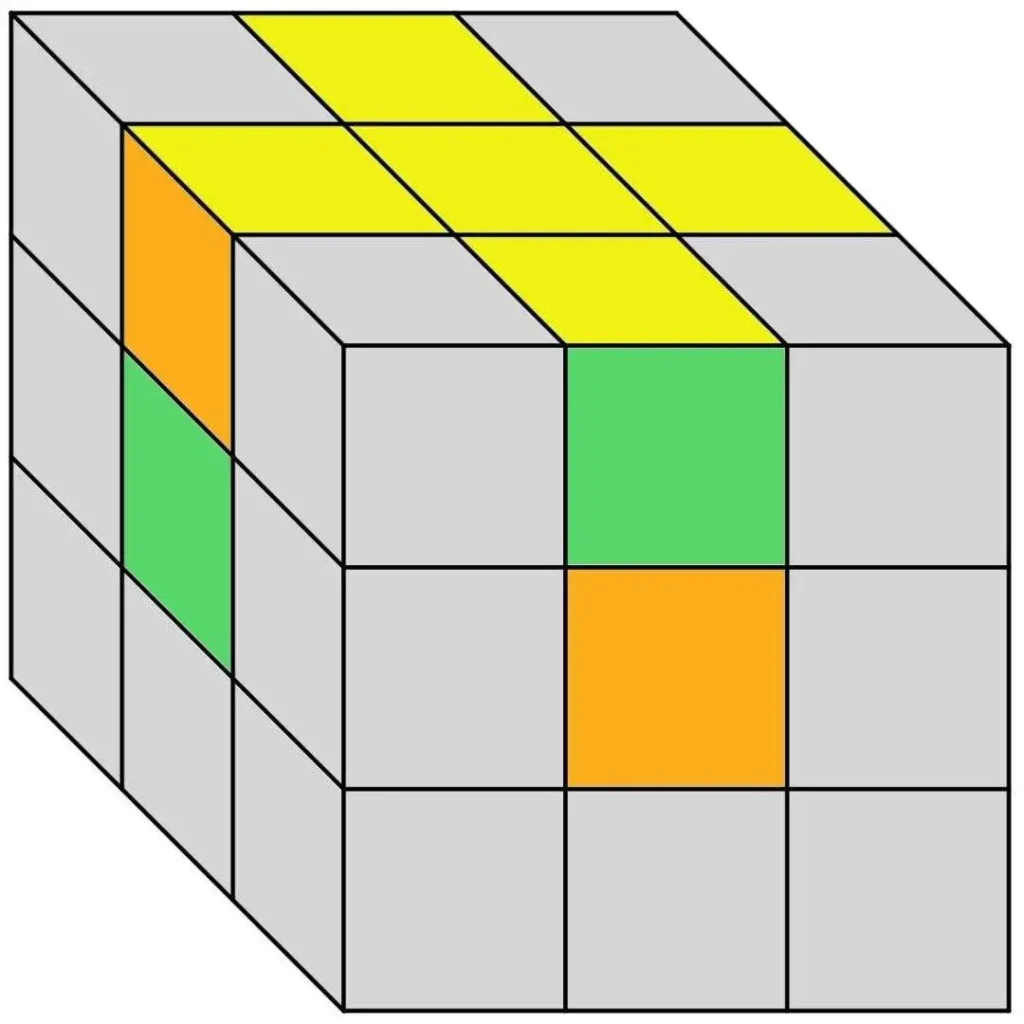
We will give one of those pesky birds a head and put a white petal in its beak. Turn the top face to create one of the pictures in Figure 16. Note the colours on your Rubik’s Cube may be different.
The direction your bird is facing decides which trigger you should use (see Figures 17-18). Whether it is fighting with another bird decides how many times you must use that trigger. See the captions in Figure 16 for details. See Figures 19-20 for practical examples.
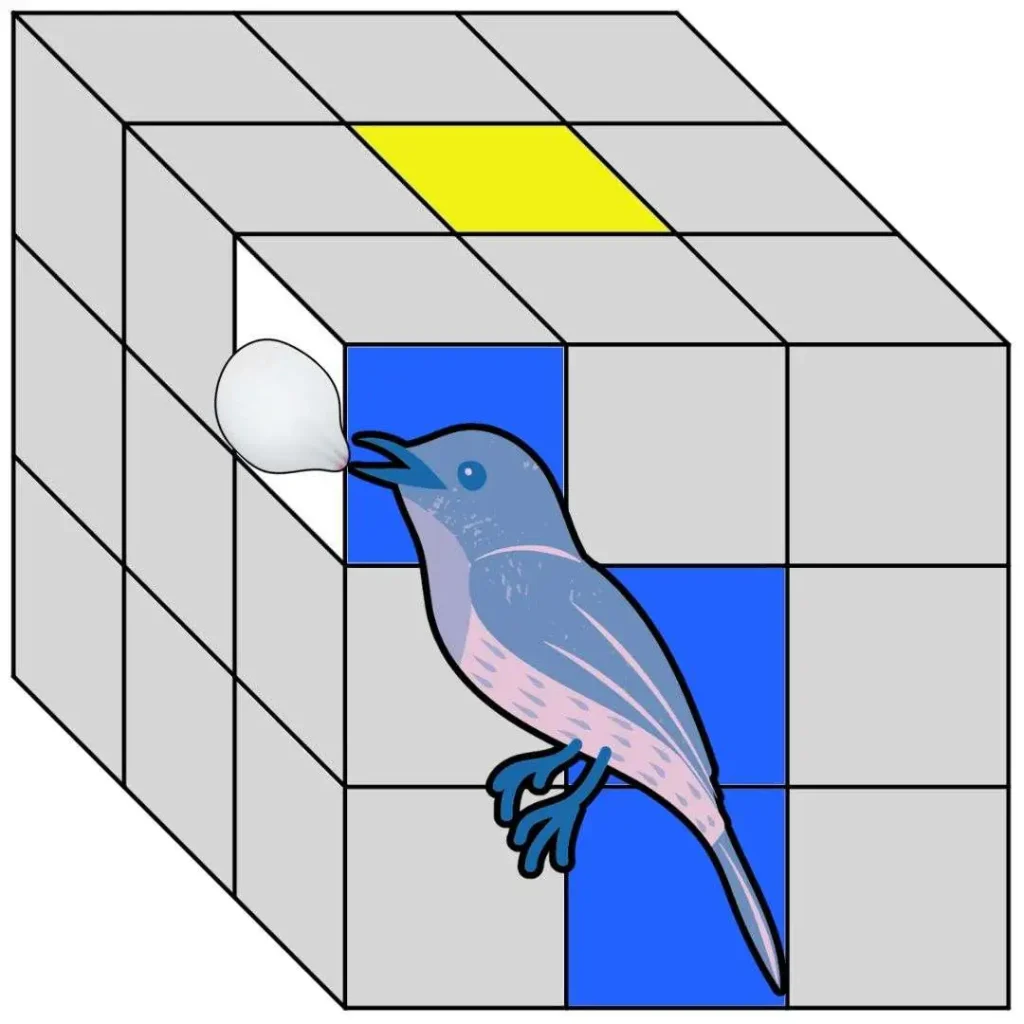
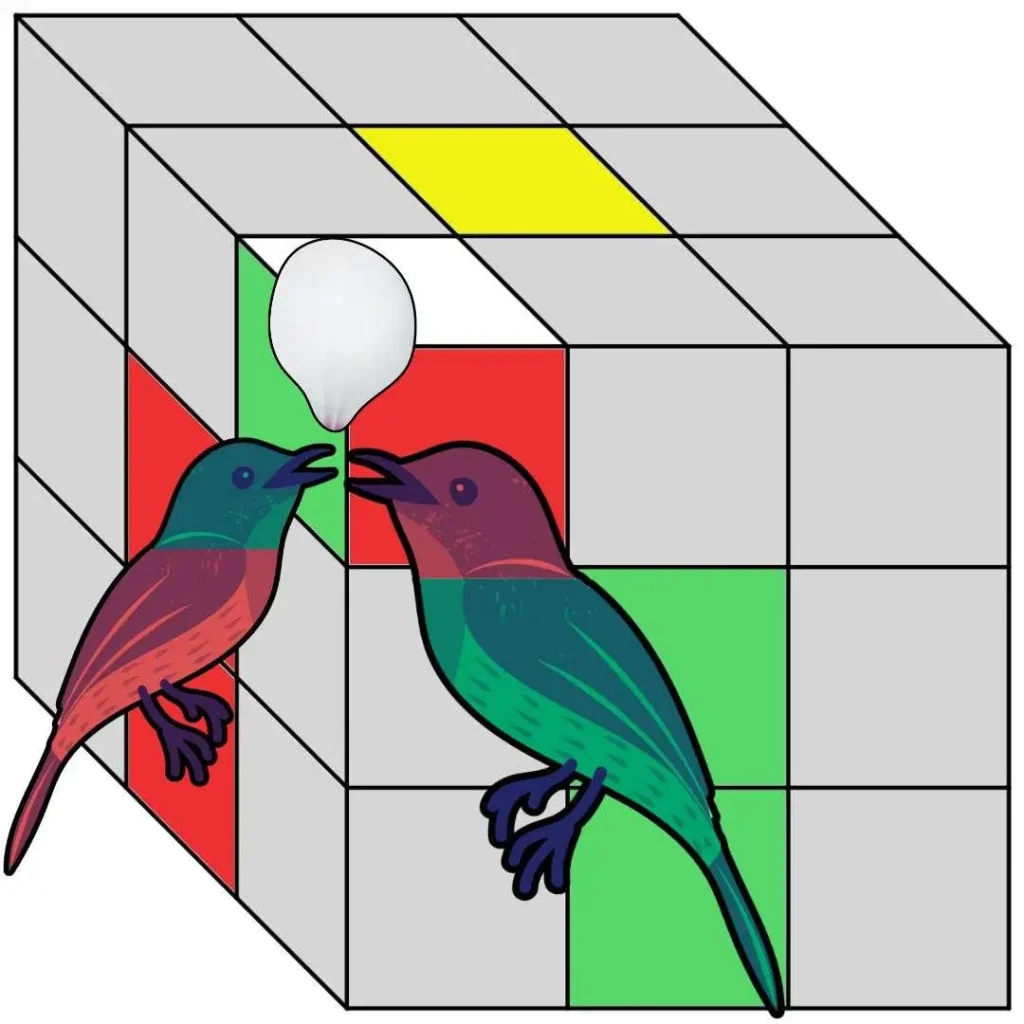
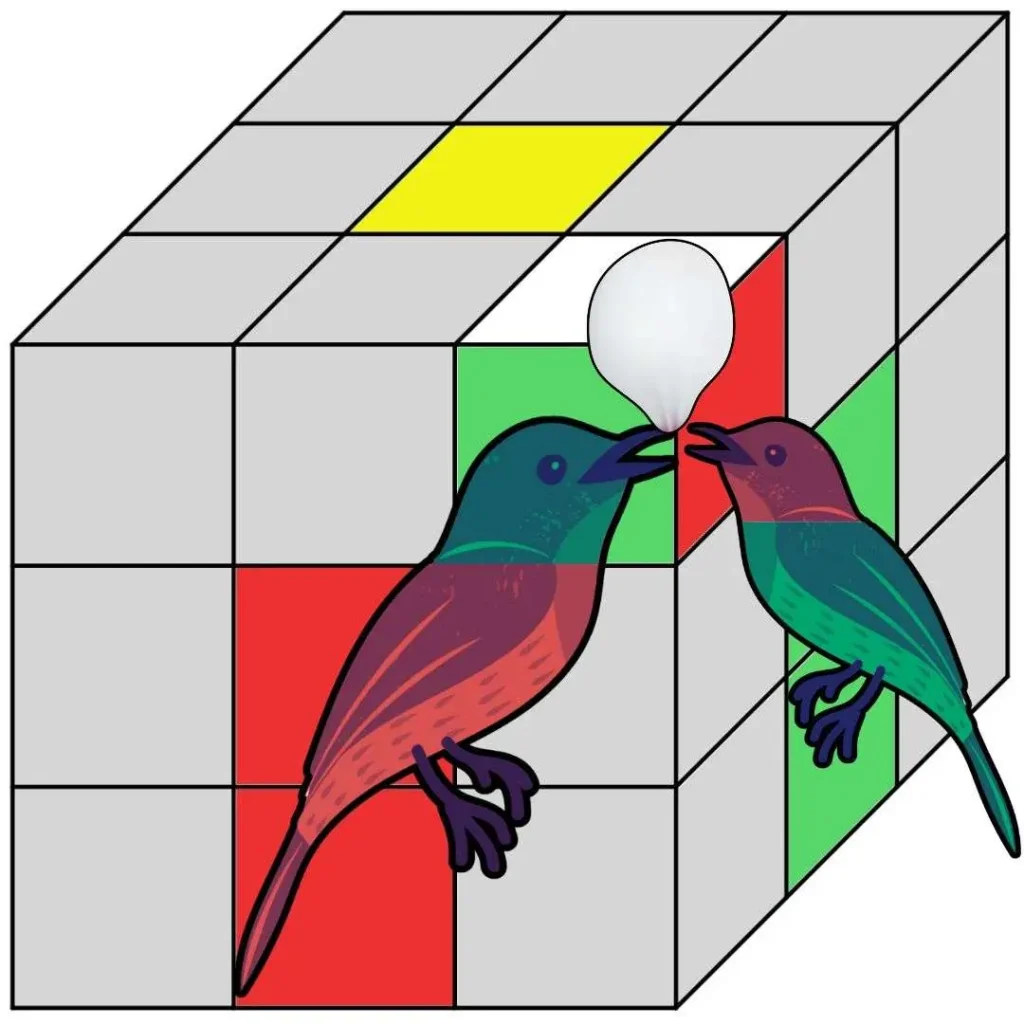
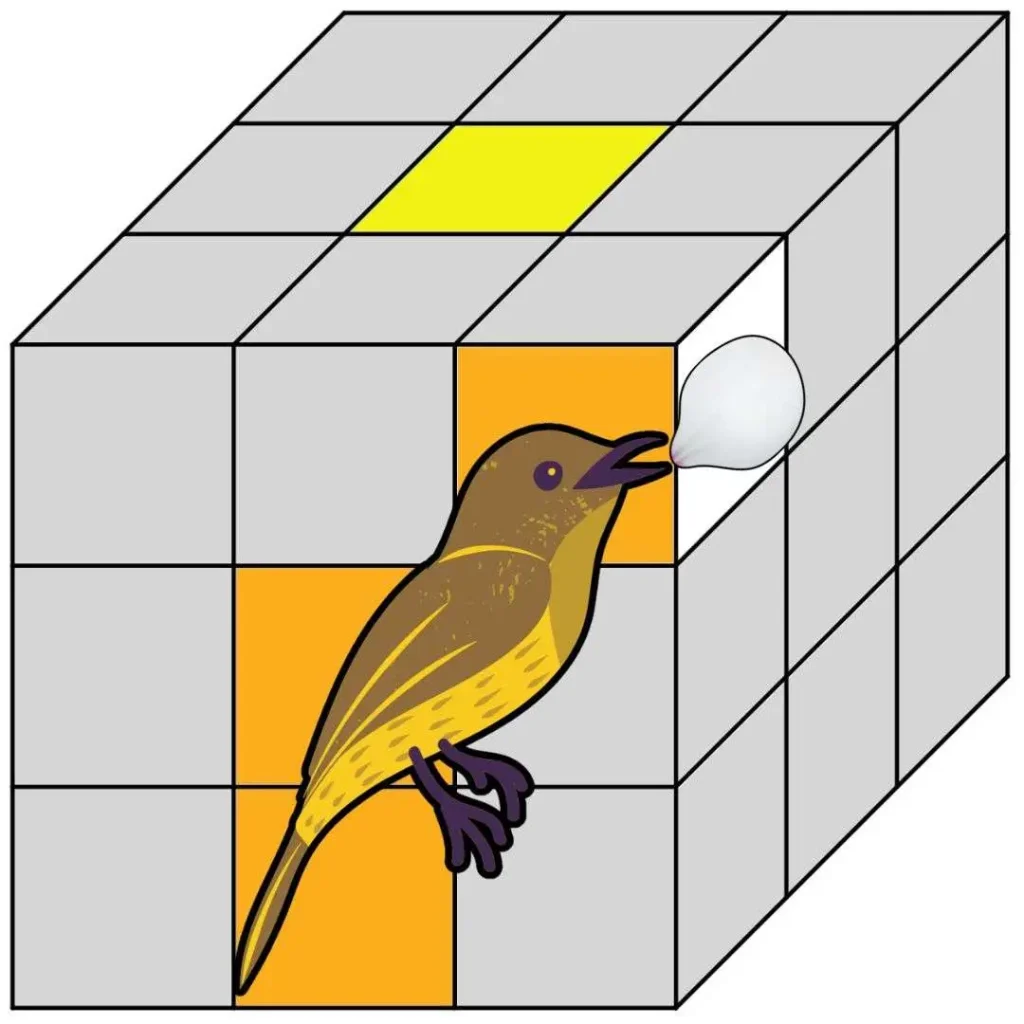
Figure 16: Various configurations of birds
Repeat until the bottom layer is complete.
- Hint: If you are unlucky and cannot create one of the birds, check out Figure 20!
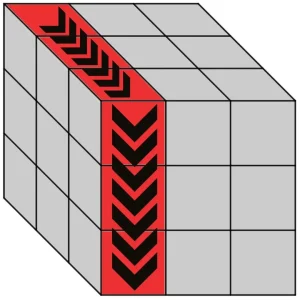
Left Trigger (LT)

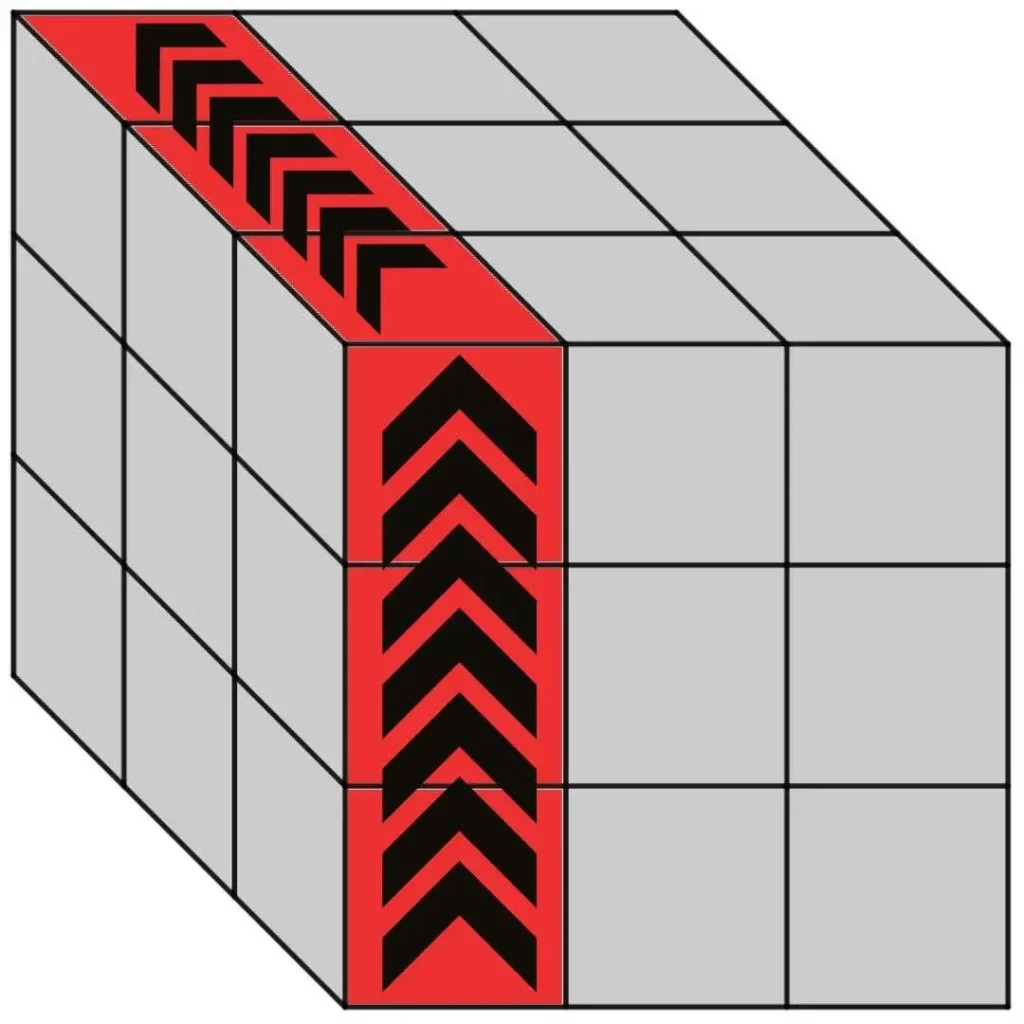
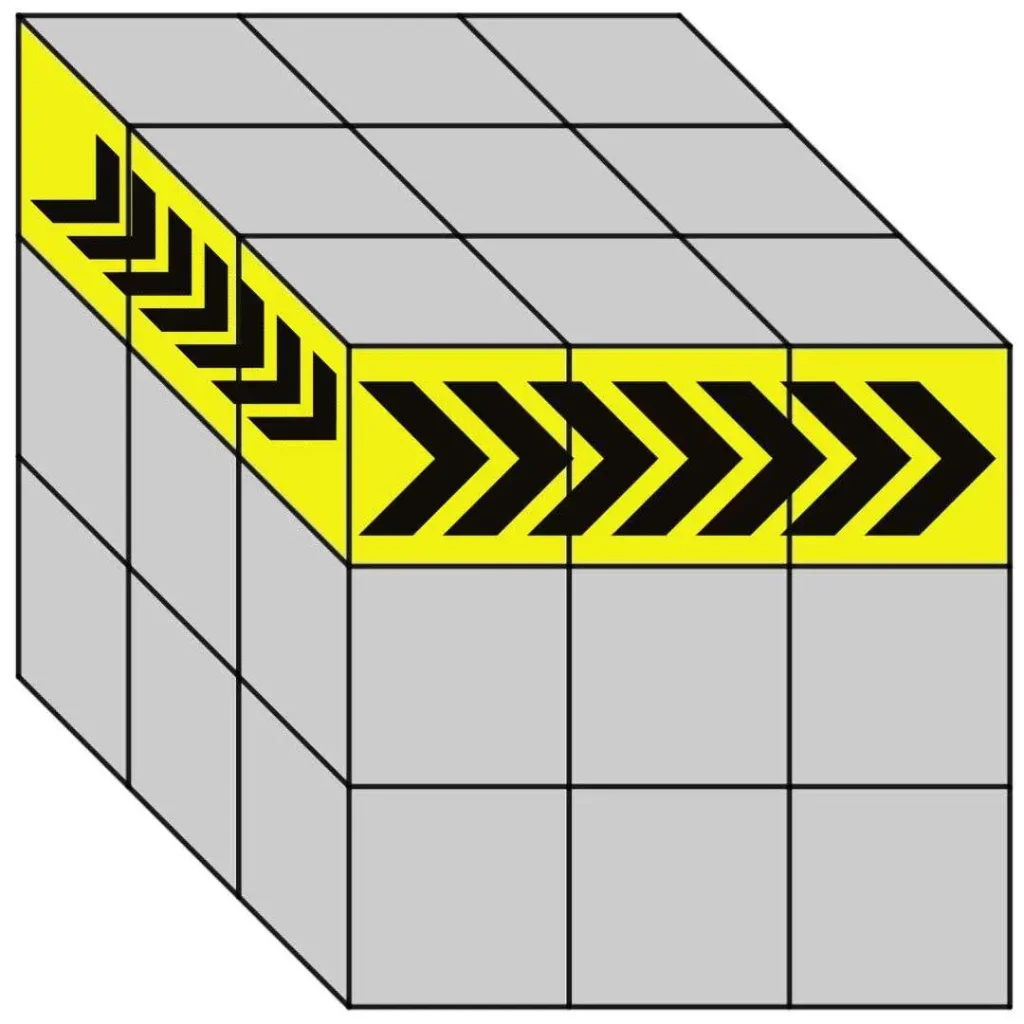


Figure 17: Left trigger (LT)
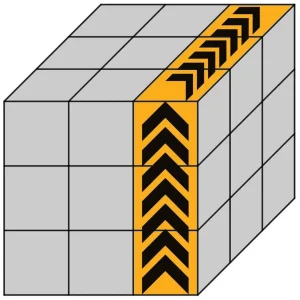
Right Trigger (RT)

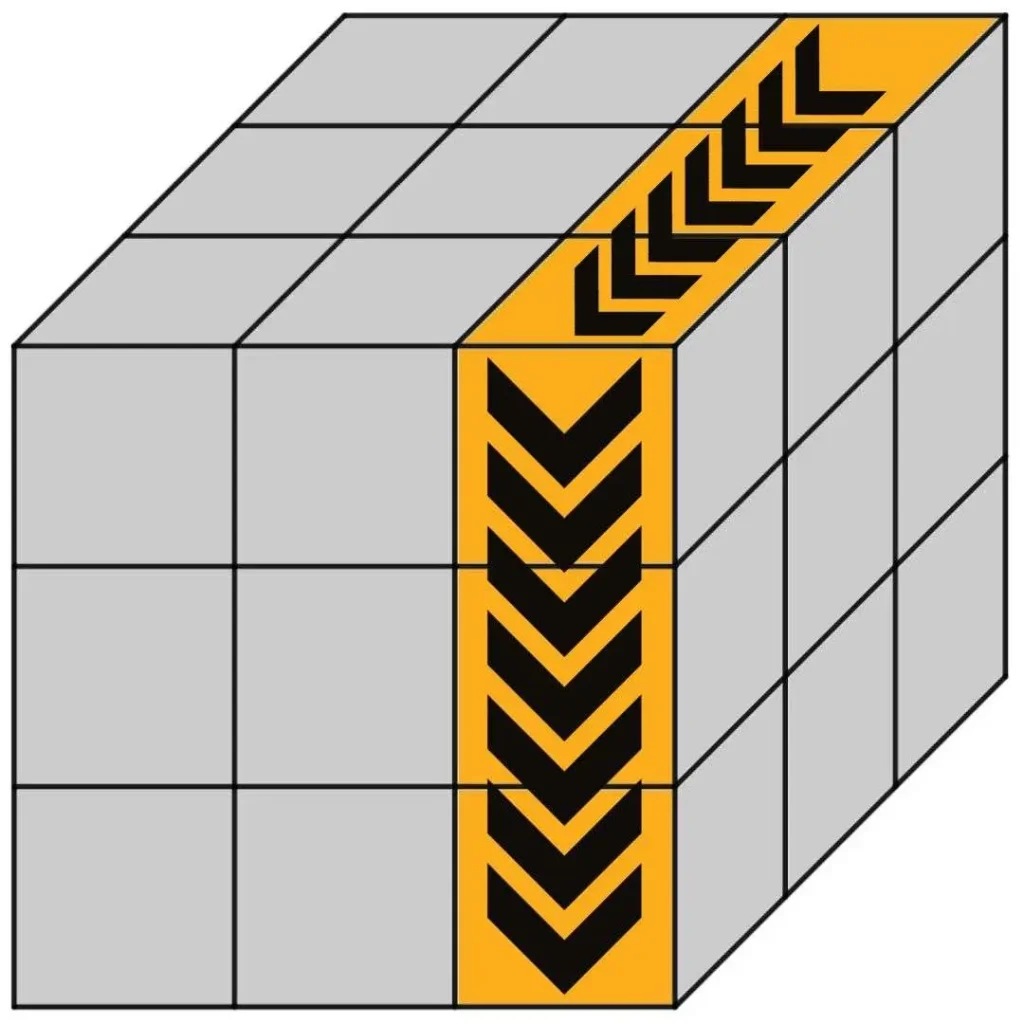
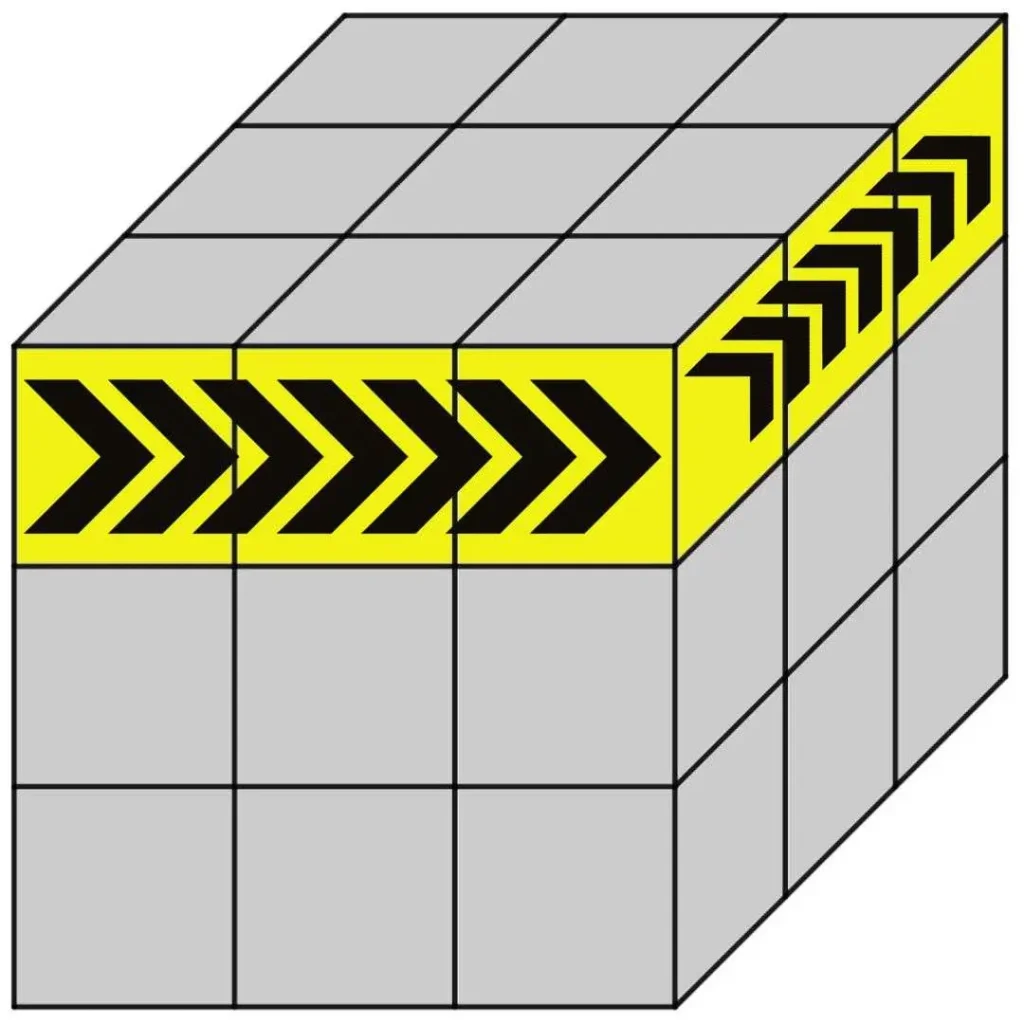
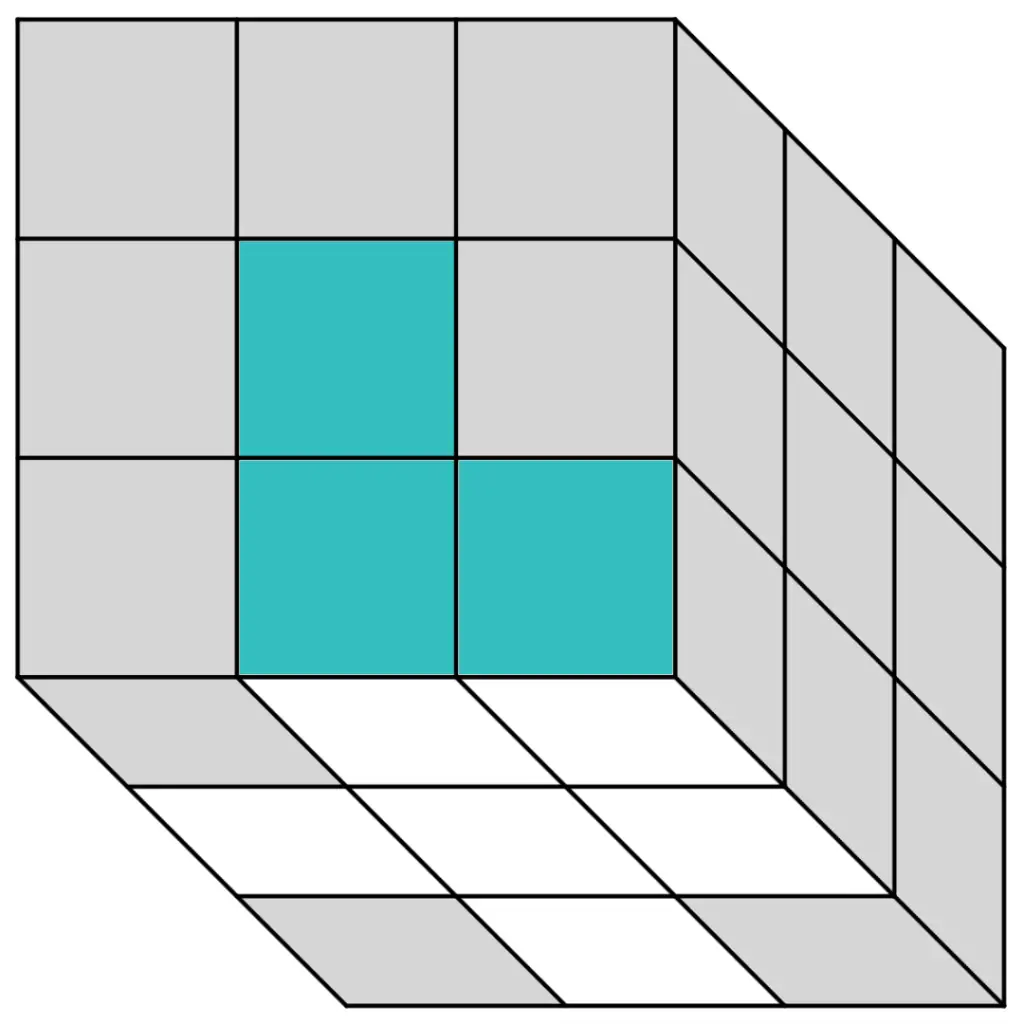
Figure 18: Right trigger (RT)
Example 1 – Two birds fighting over a petal in the top-right corner


Figure 19: x3 right triggers
Example 2 – If you cannot make any birds
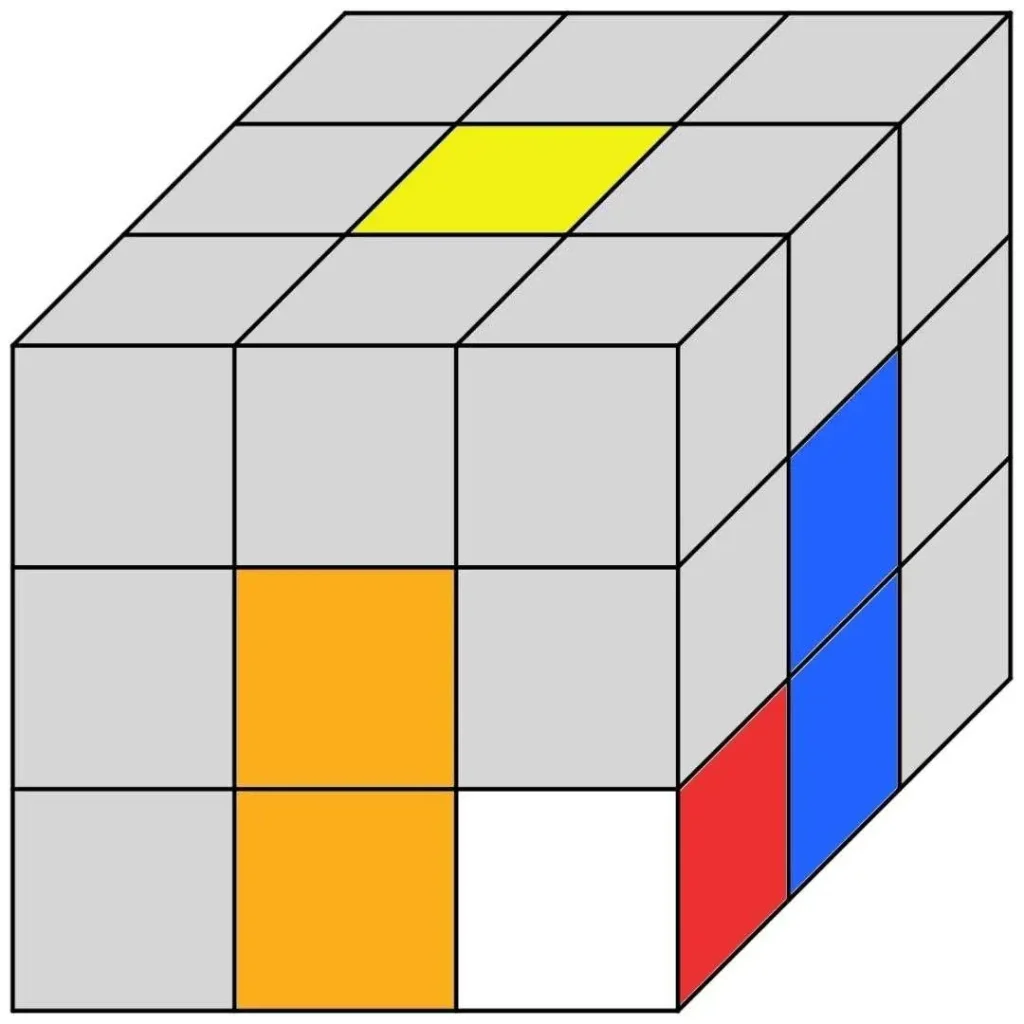
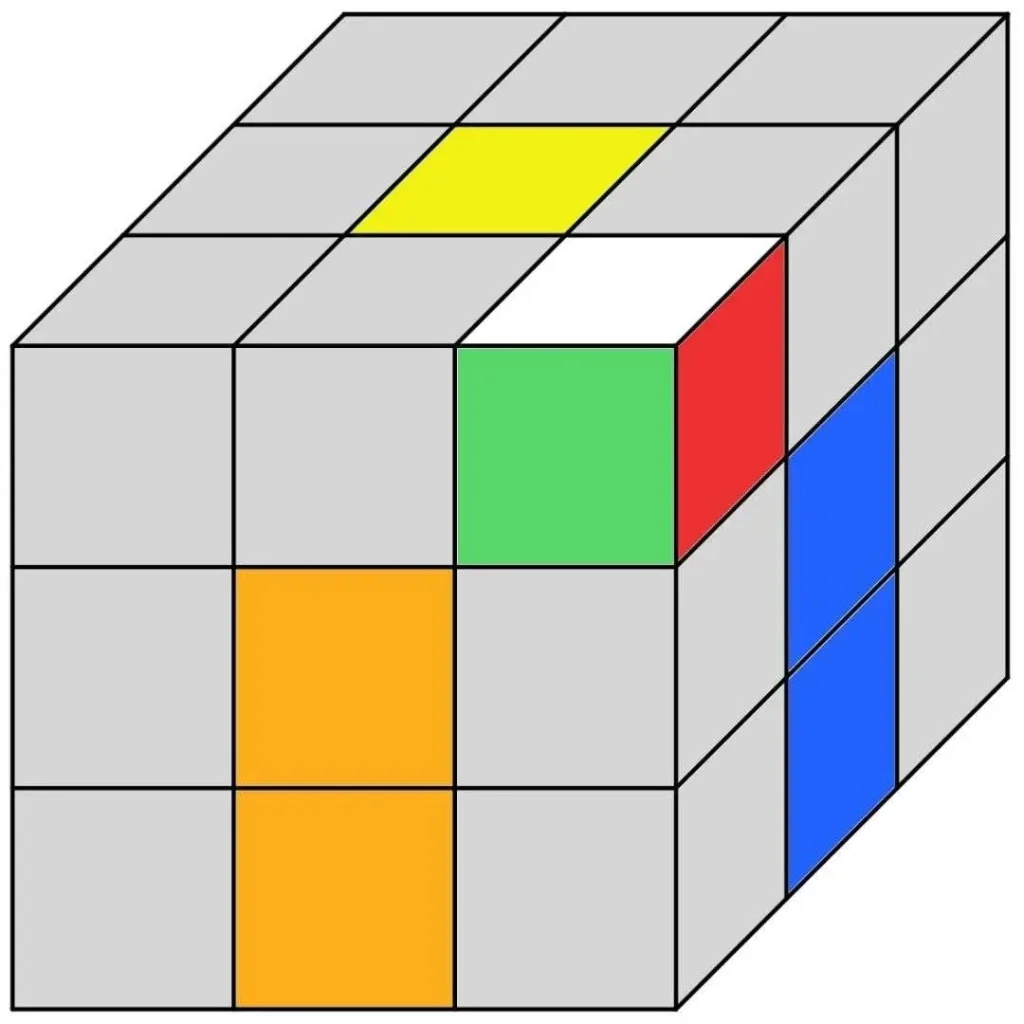
Figure 20: The white sticker is stuck in the bottom-right corner. Using the right trigger moves it into the top layer. From there, we can turn the top layer to make one of the configurations from Figure 16 and continue as normal.
The Middle Layer
Step 4: The Delivery Bunnies
Goal: Complete the middle layer of the Rubik’s Cube by finding the Delivery Bunnies.
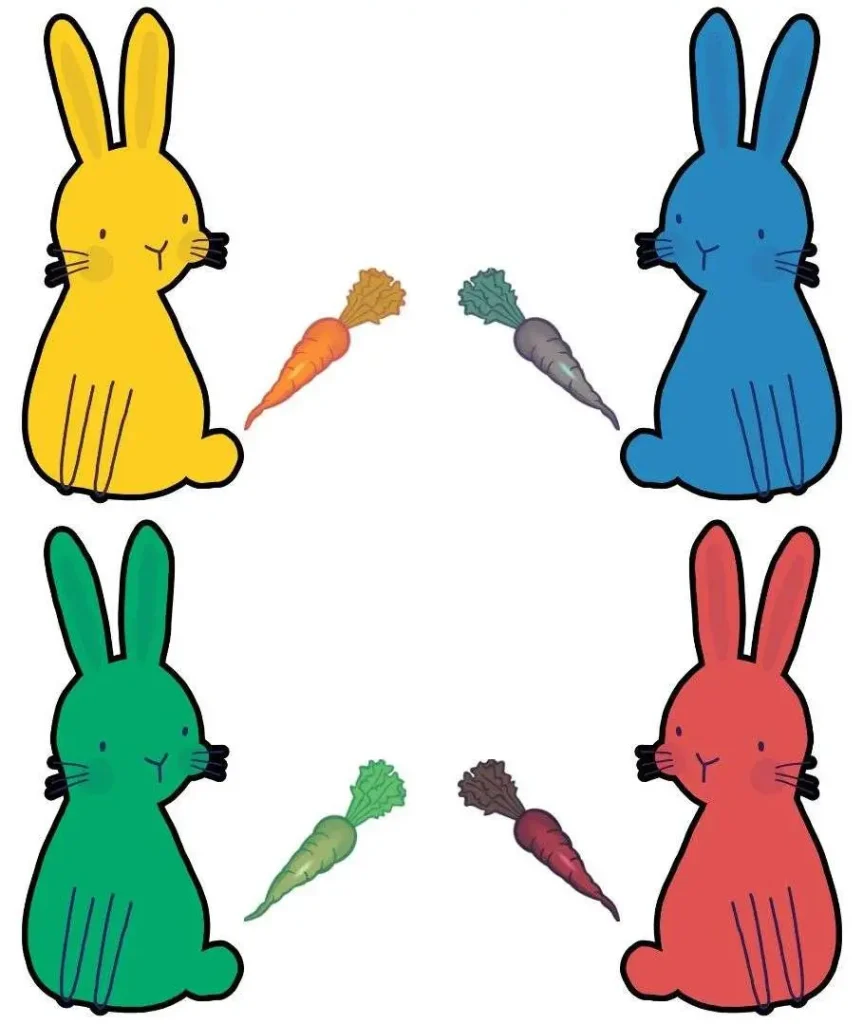
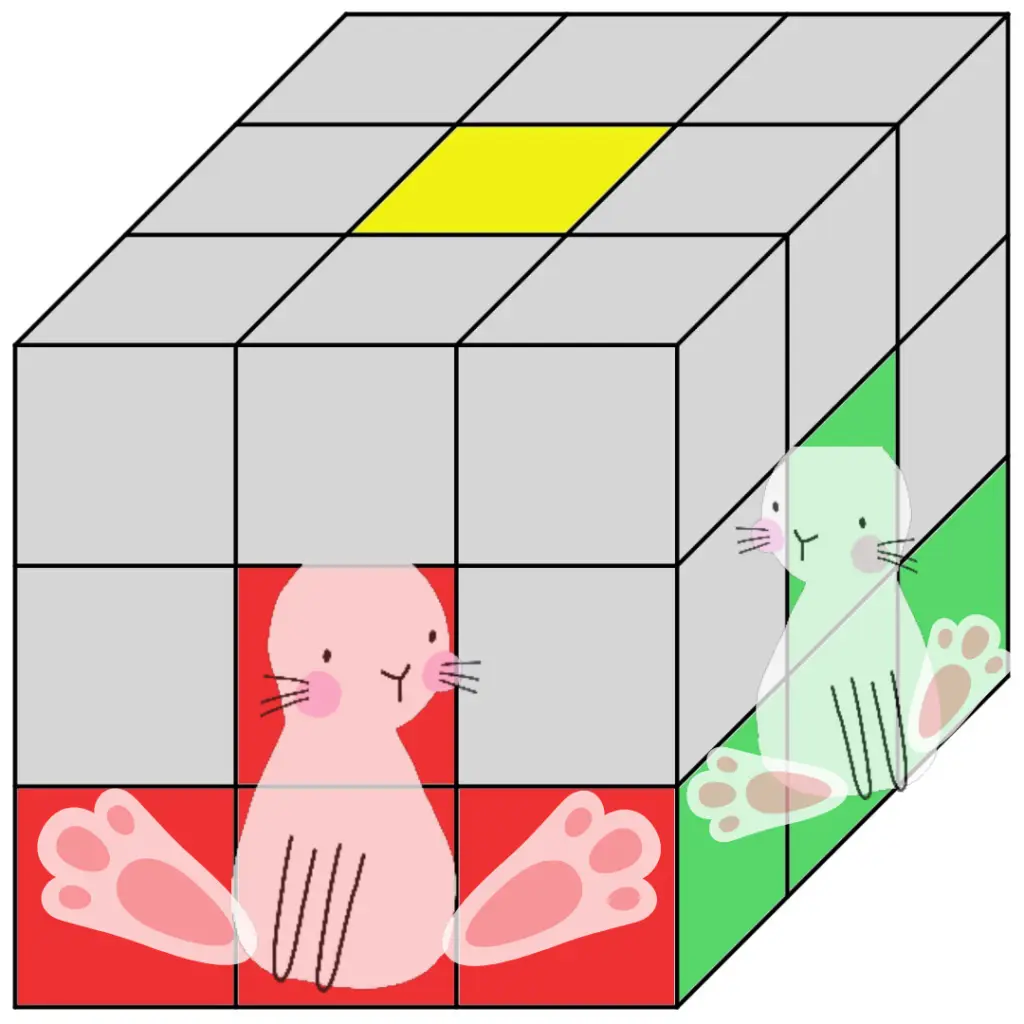
At this stage, you’ll see the bodies of the delivery bunnies! (See Figure 22).
Turn the top face of your Rubik’s Cube to match one of the configurations in Figure 23. Remember, the colours may vary. Ensuring the carrot is the same colour as the neighbour is essential.
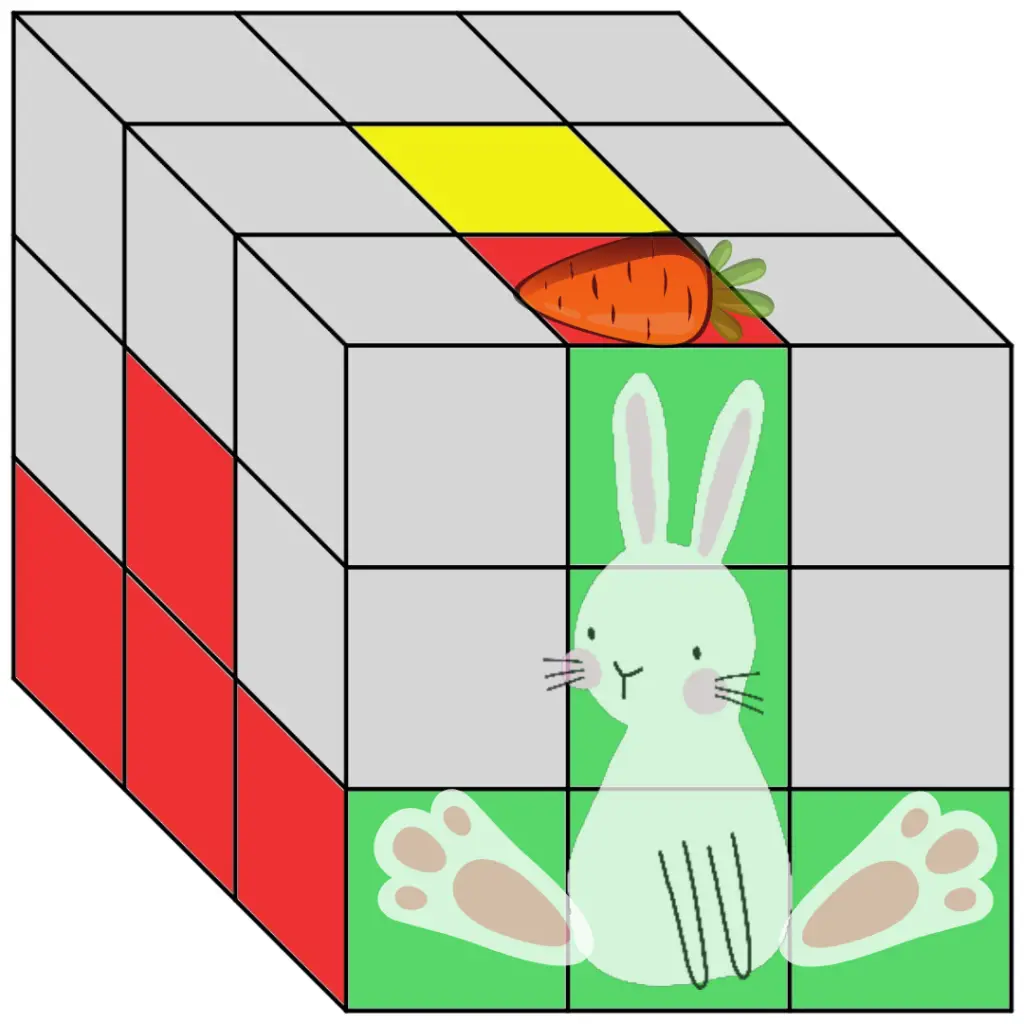
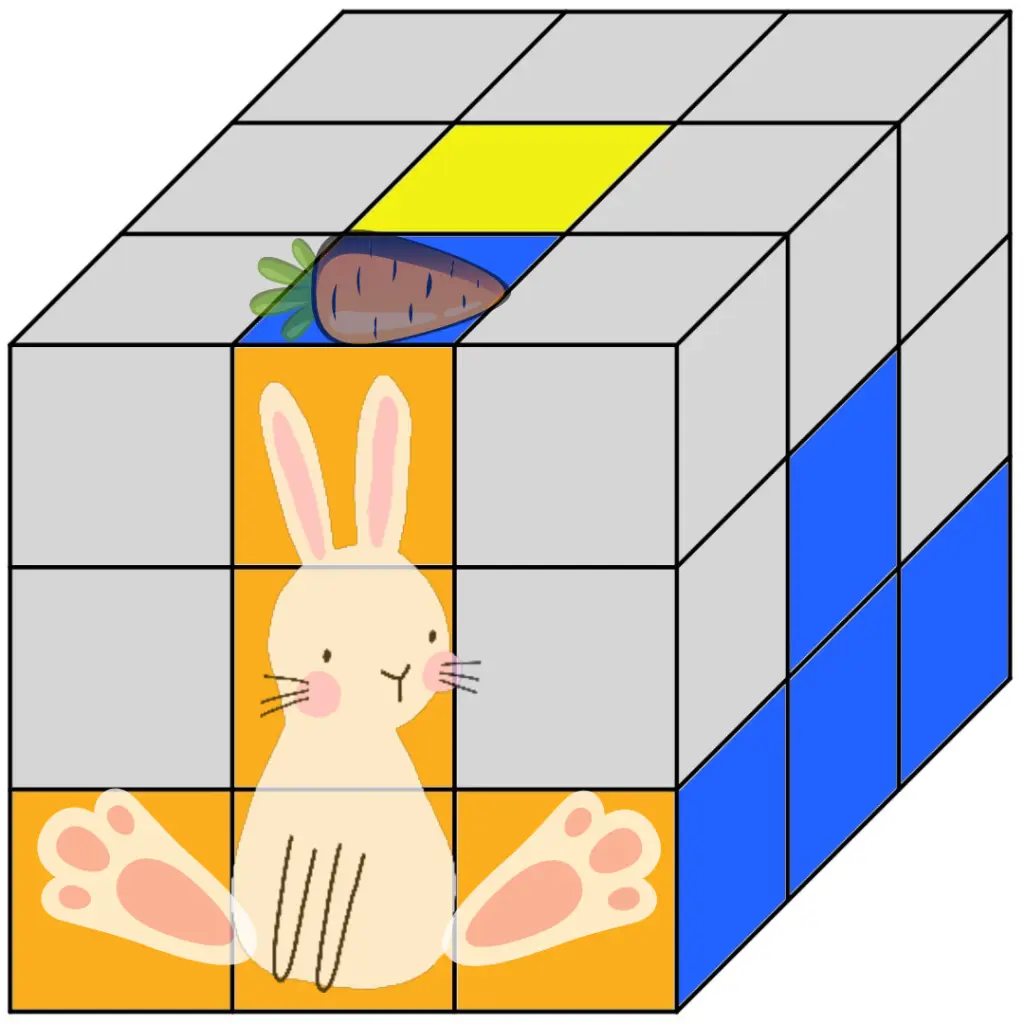
If your bunny has a carrot for the neighbour to the left, use the algorithm in Figure 24. If your bunny has a carrot for the neighbour to the right, use the algorithm in Figure 25. Repeat until the middle layer is complete!
- Hint: Focus on the four possible carrot colours (green, blue, red, orange) to make the bunnies.
- Hint: If you are unlucky and cannot create one of the bunnies with a carrot, check out the Example and Figure 26 below.
If the neighbour is to the left

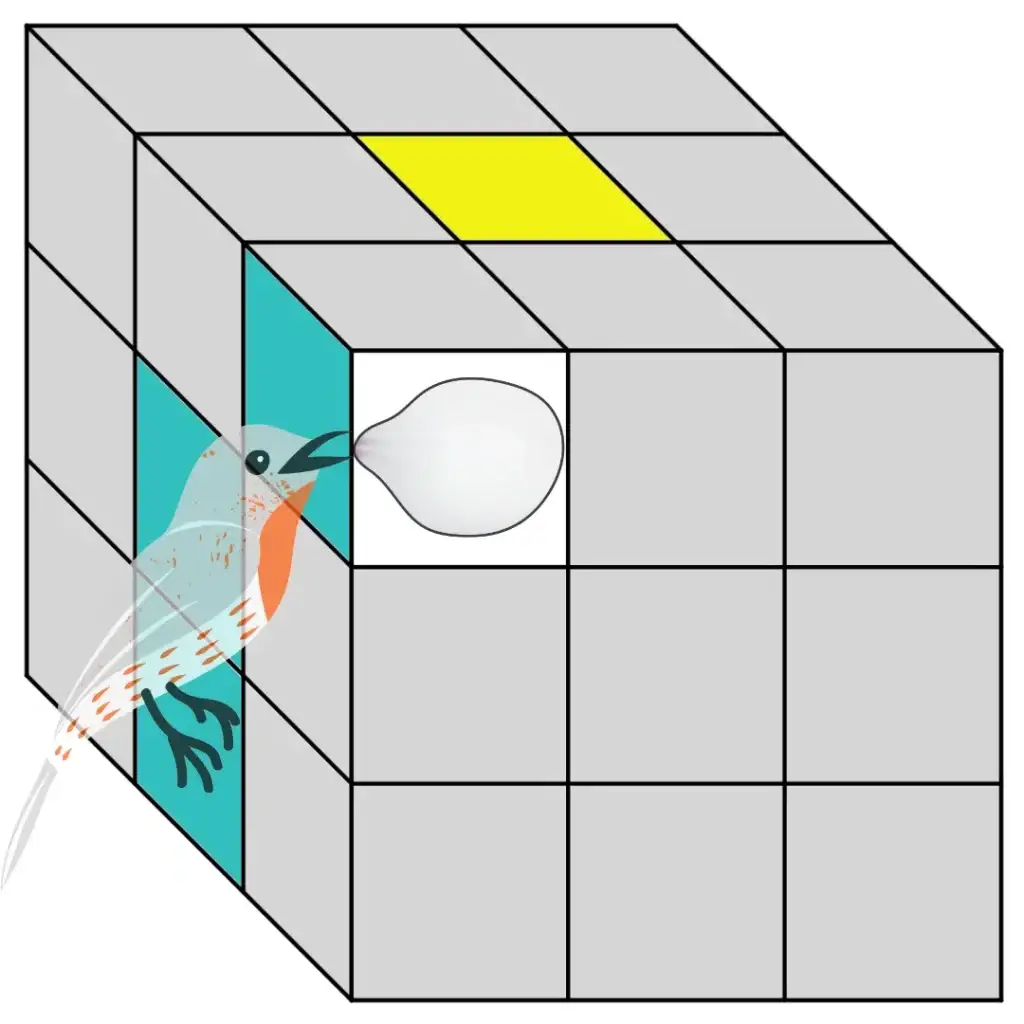
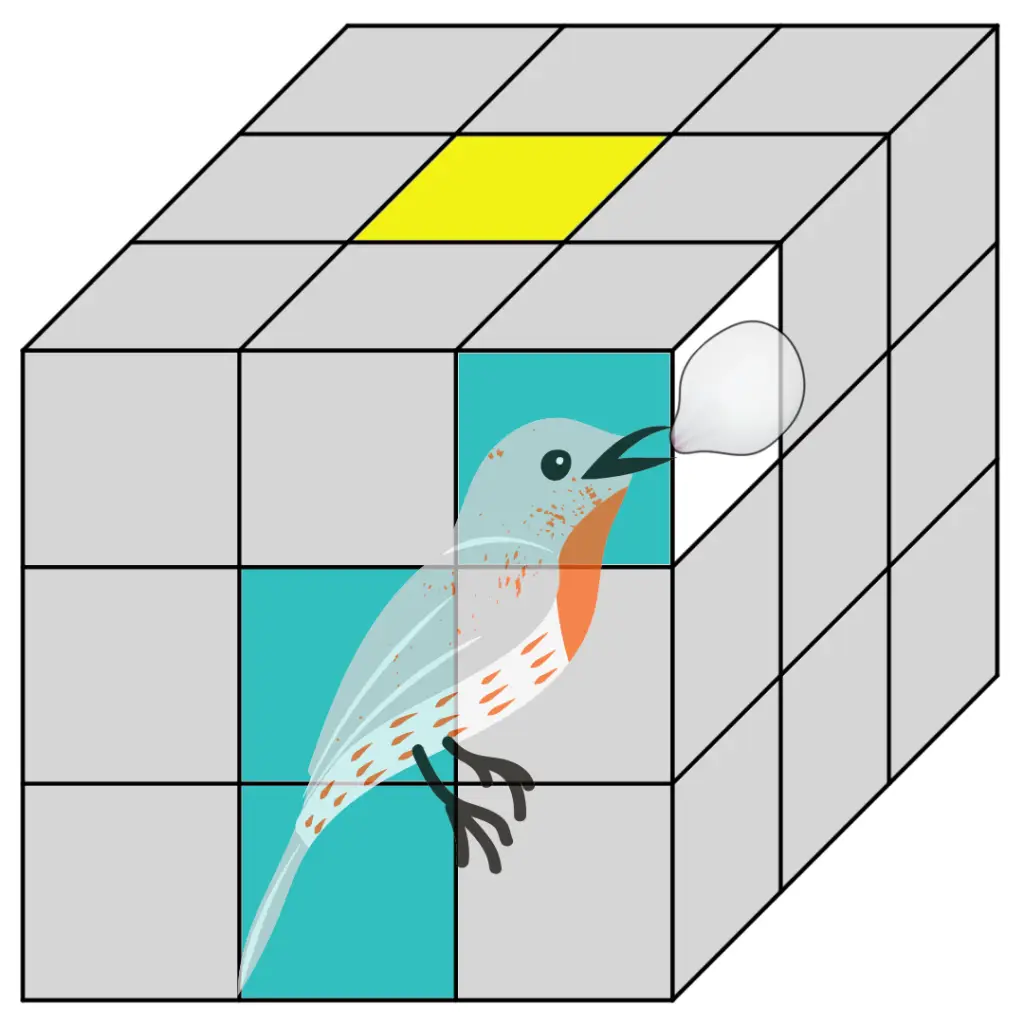

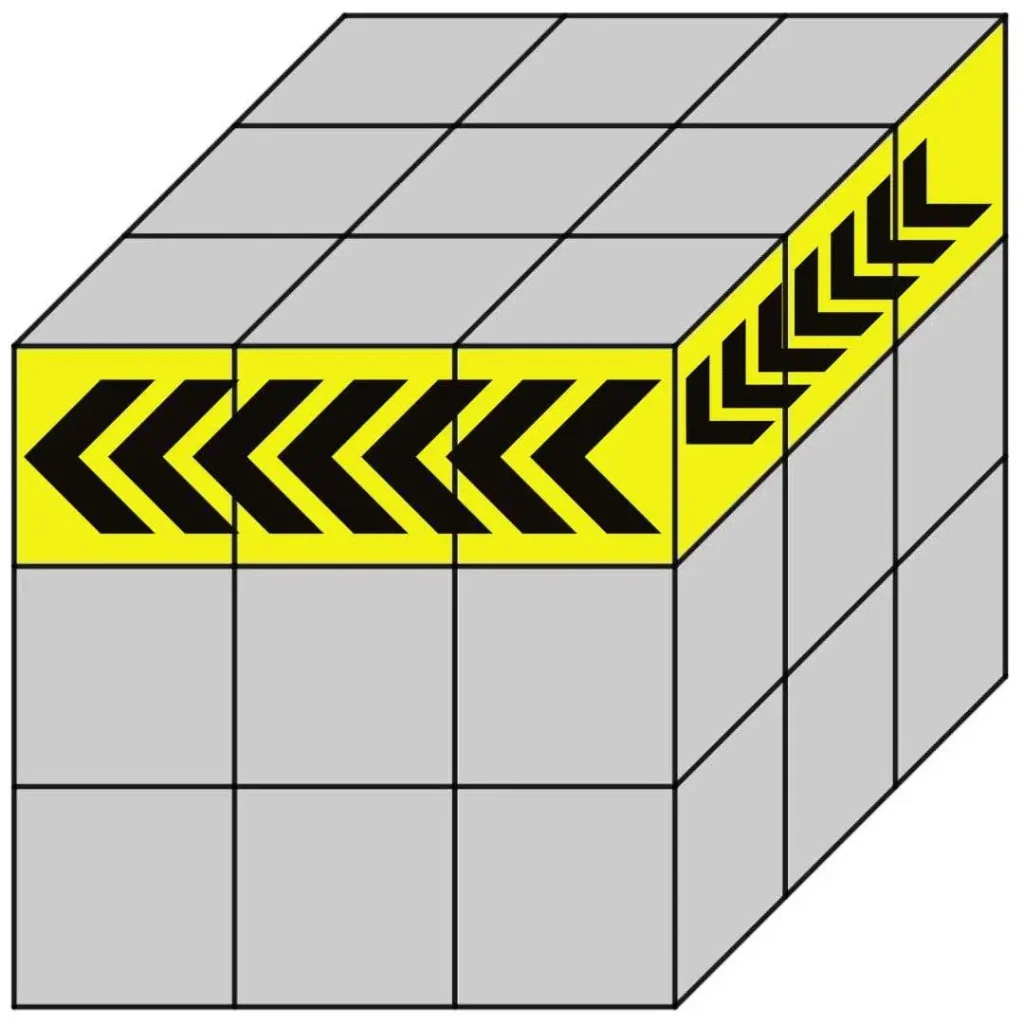

Figure 24: With one extra move before the left trigger, we can create a new bird, which we already know how to solve with the right trigger
If the neighbour is to the right
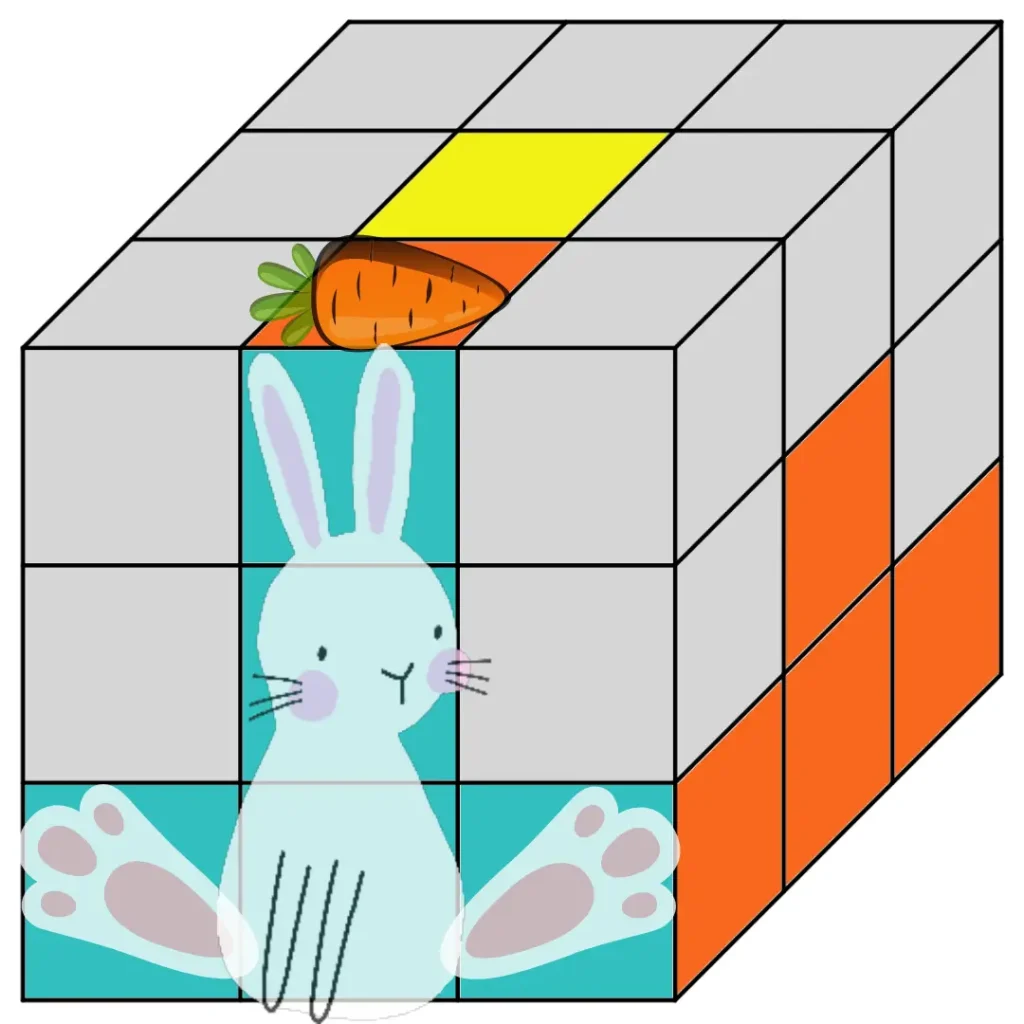

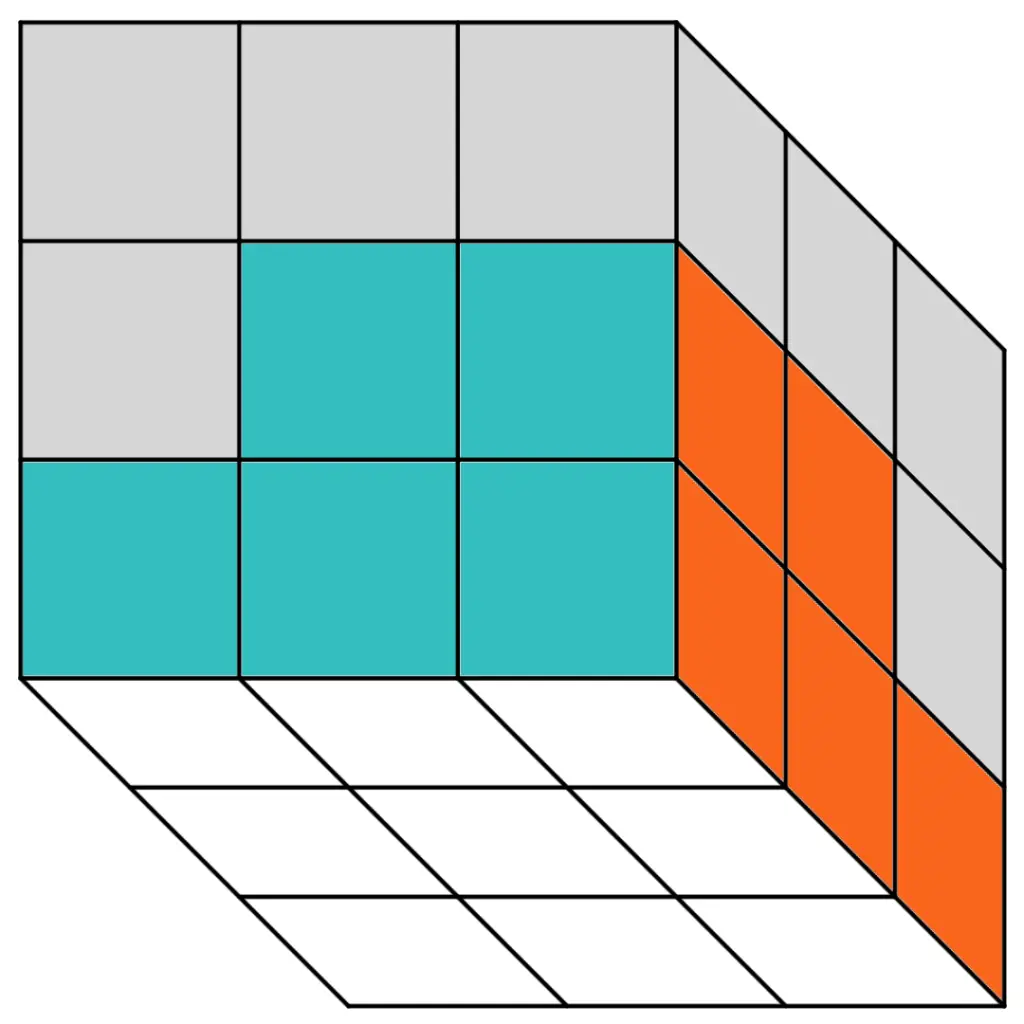
Figure 25: With one extra move before the right trigger, we can create one of the birds which we already know how to solve
Example – if you cannot make a bunny
In rare cases, a piece will be in the correct position but with the colours the wrong way around. With that piece on your right (like in this example), do the routine with a neighbour to the right. After that, making a new bunny and continuing as usual should be easy.
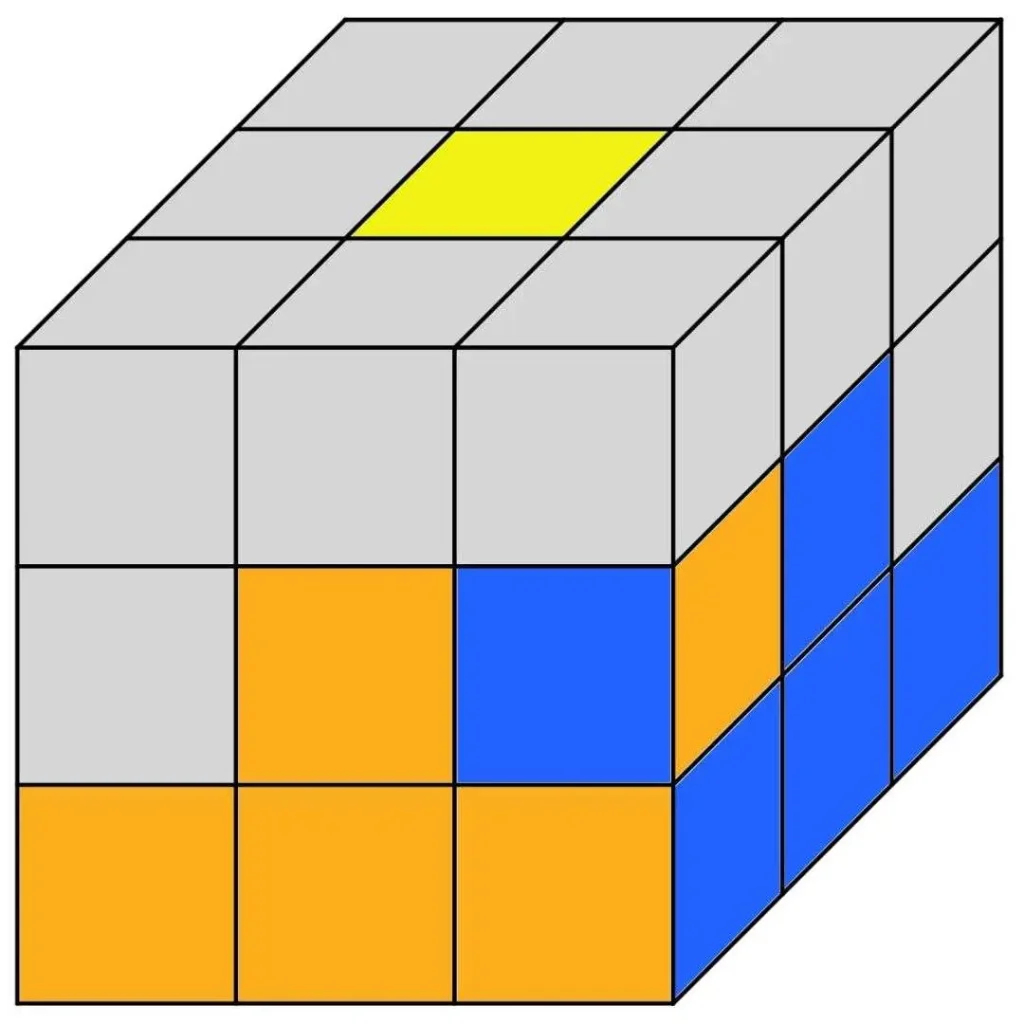

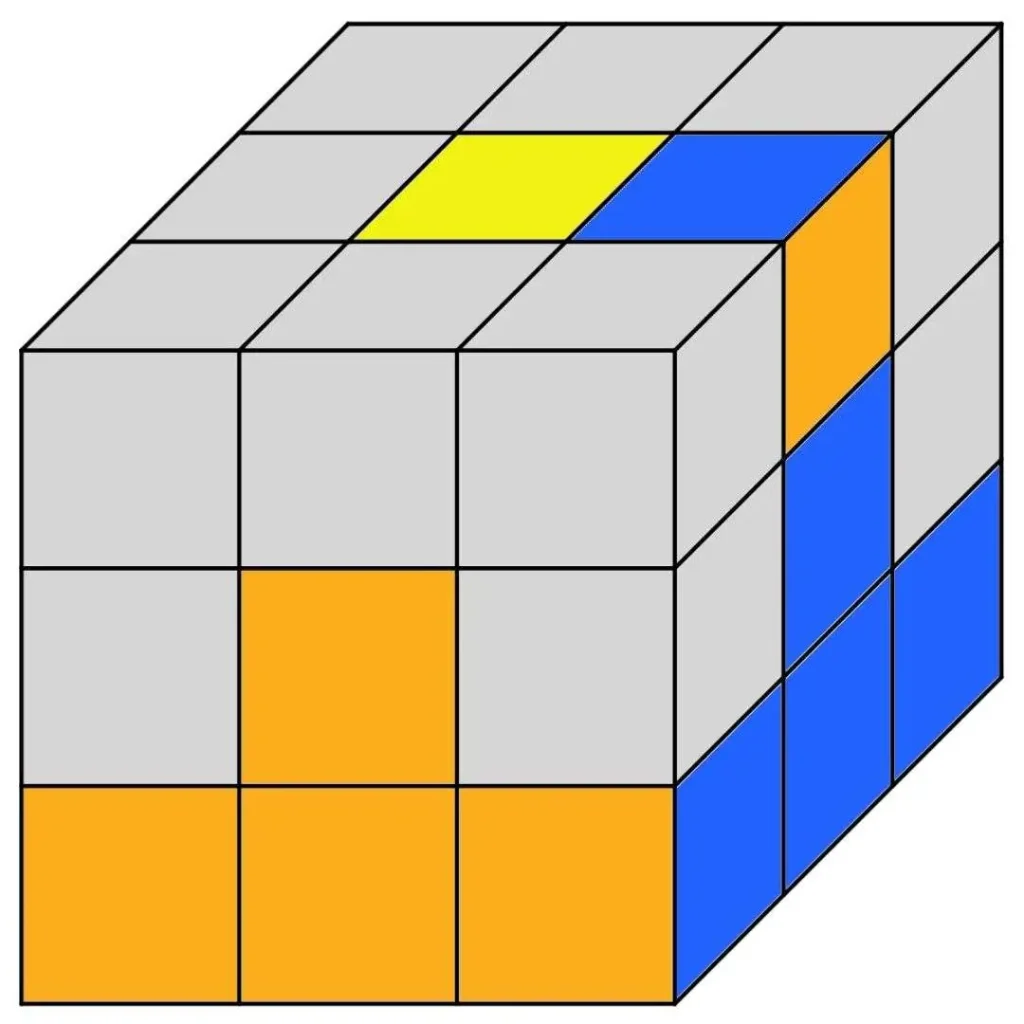
Figure 26: We have made the orange bunny with a blue carrot for its blue neighbour
The Top Layer
Step 5: The Yellow Cross
Goal: Create a yellow cross on the top face of the Rubik’s Cube (see Figure 27.4).

This step concerns pattern recognition and applying the Sunset routine (see Figure 28). Check out the various configurations in Figure 27. Use the Sunset to transition from one pattern to the next. You will have one of the configurations when you begin.
- Hint: Make sure the capital “L” is in the far-right corner (so it looks like an “L”) before moving from configuration 2 to 3. See Figure 29 for a practical example.
The Sunset


Figure 28: Repetitions of the Sunset allow us to form the yellow cross
Example
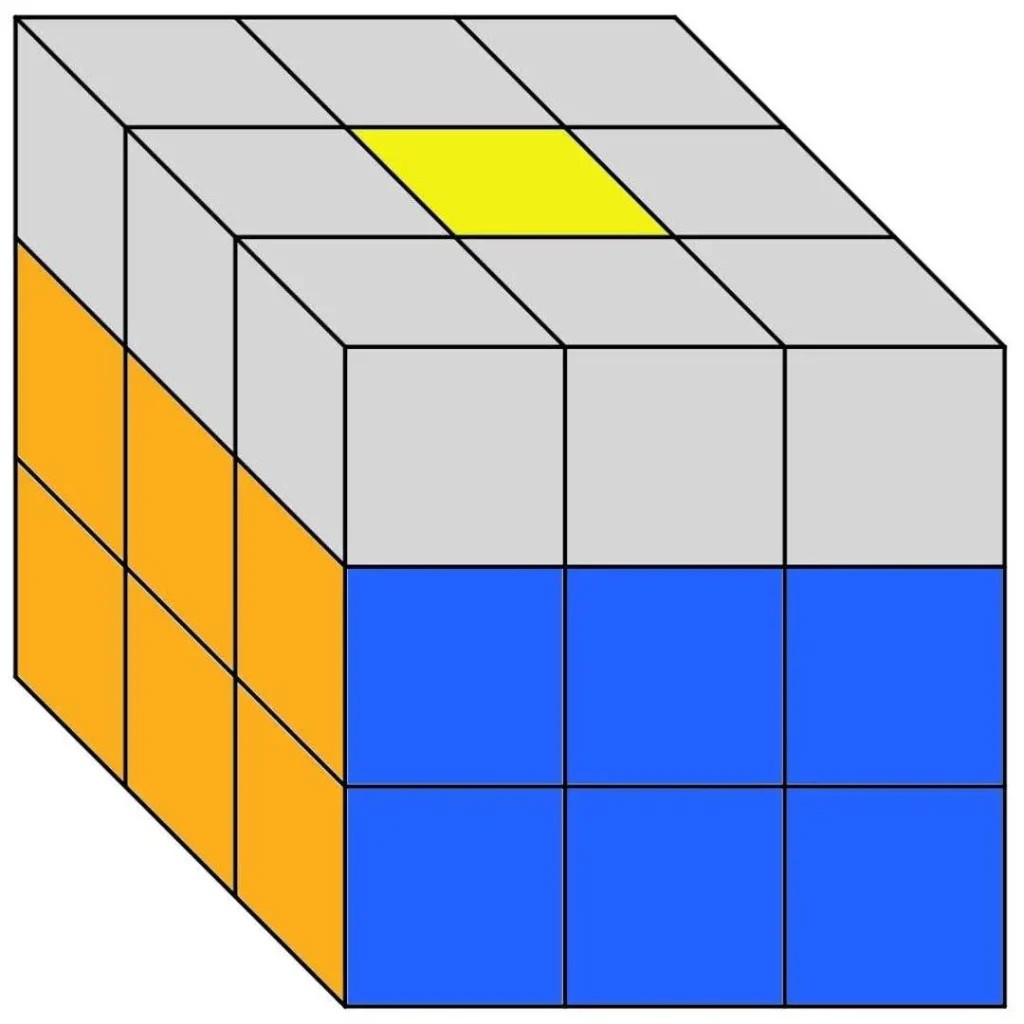


Figure 29: Applying the Sunset to configuration 1 will leave the “L” in the wrong corner. It is important to correct it and move it to the far-right corner.
Step 6: Aligning the Yellow Cross
Goal: Align the yellow petals with the centre stickers of adjacent faces (see Figure 30.2).
Use the Switch (see Figure 31) to align the yellow petals. The Switch switches the positions of the yellow petal on the front and the yellow petal on the left. See Figure 32 for an example of the Switch in action.
This step is critical in solving the top layer. You’ll need some strategic thinking to minimise the times you need to use the Switch.
- Hint: You can align at least one of the petals without using the Switch. Turn the top face to align as many petals as possible before switching.
The Switch

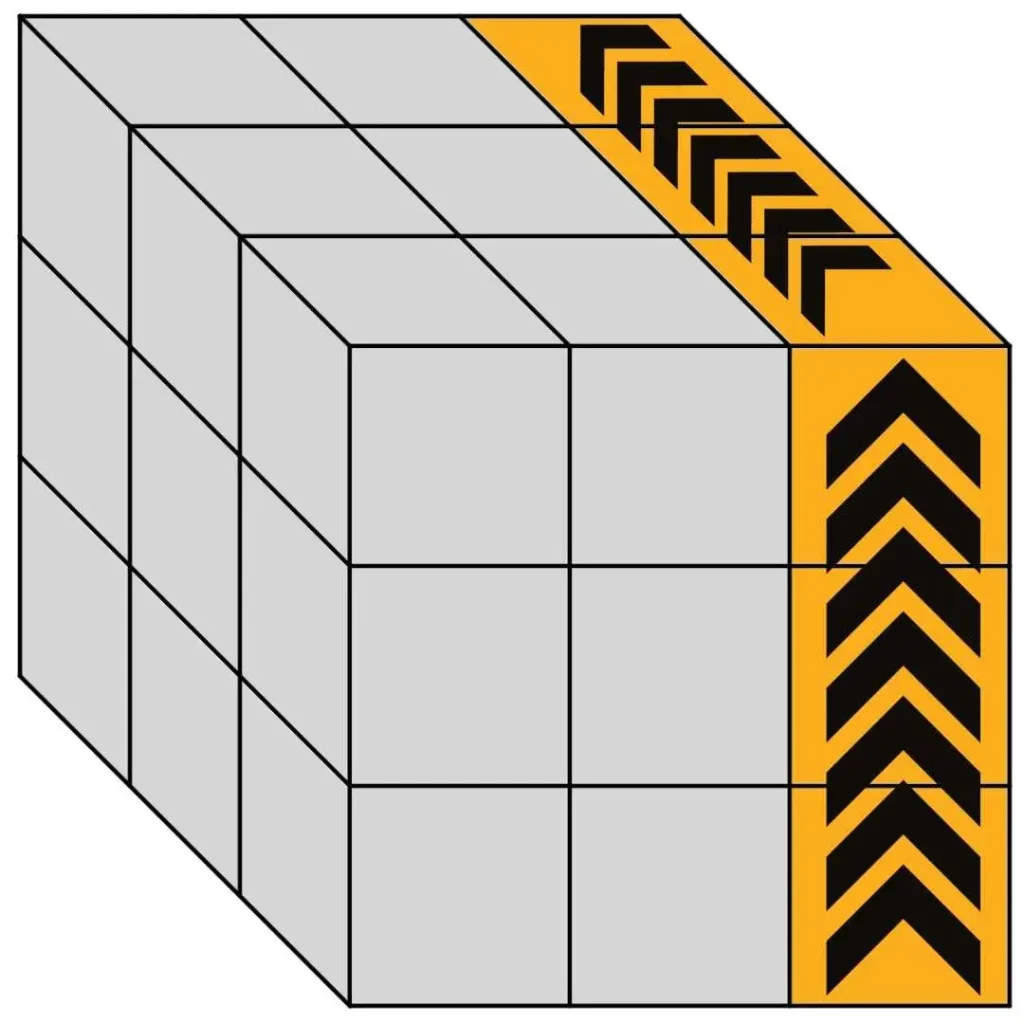
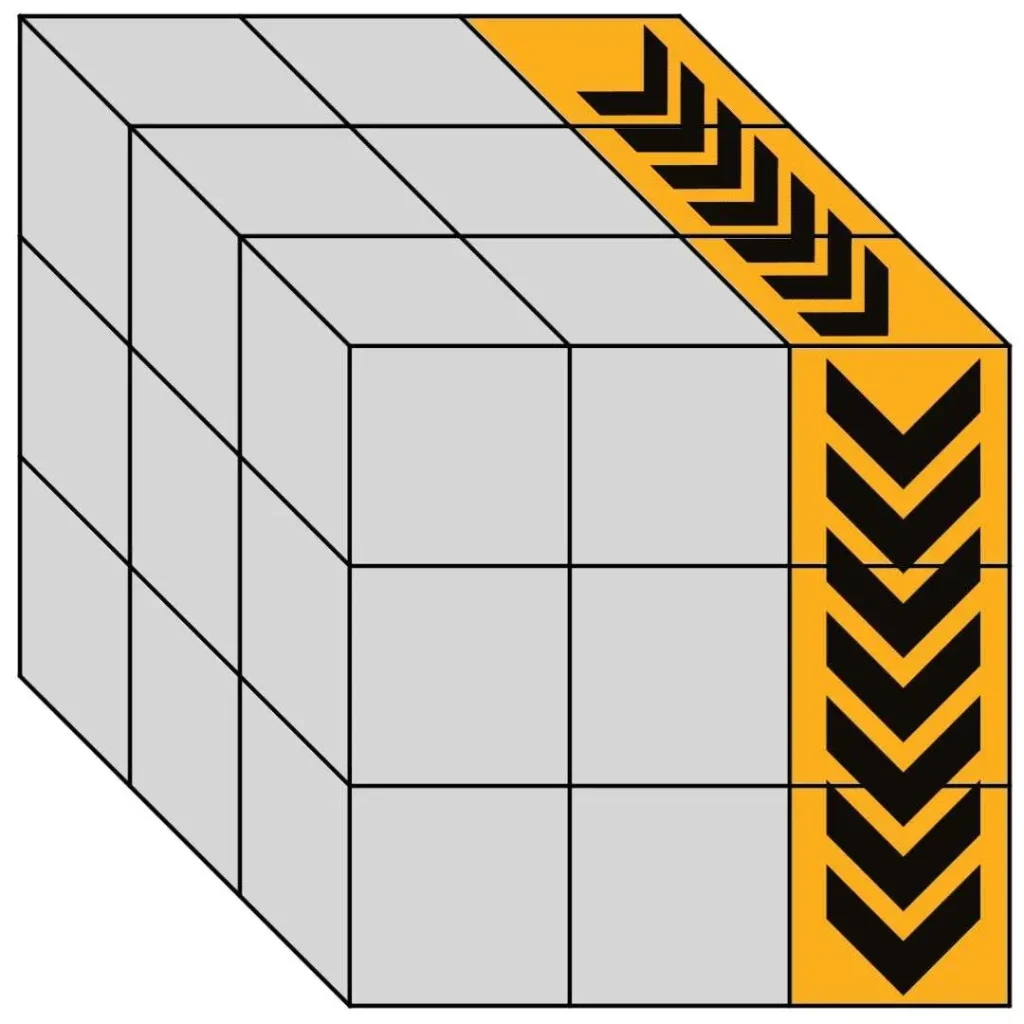
Figure 31: The Switch is a long routine but it’s repetitive and won’t take long to memorise
Example


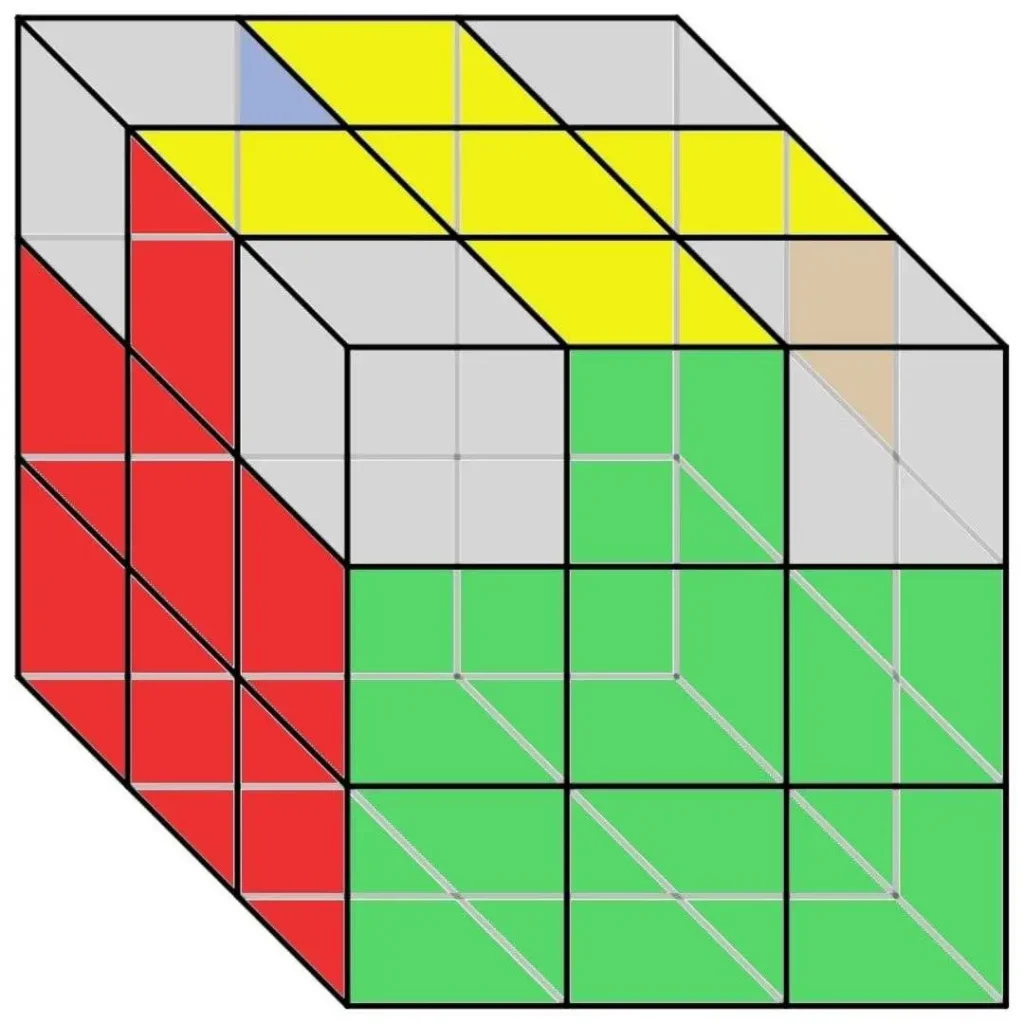
Figure 32: We apply the Switch routine to align the petals with the orange and blue faces. We then turn the Rubik’s Cube and use the Switch routine again to align the petals with the red and green faces.
Step 7: Positioning the Corner Pieces
- Goal: Ensure each corner piece is in the correct place. See Figure 33.1 for an example.
- Key: Use the Cycle (see Figure 34) to get each corner piece to the right position.
- Example: See Figure 35 for an example.
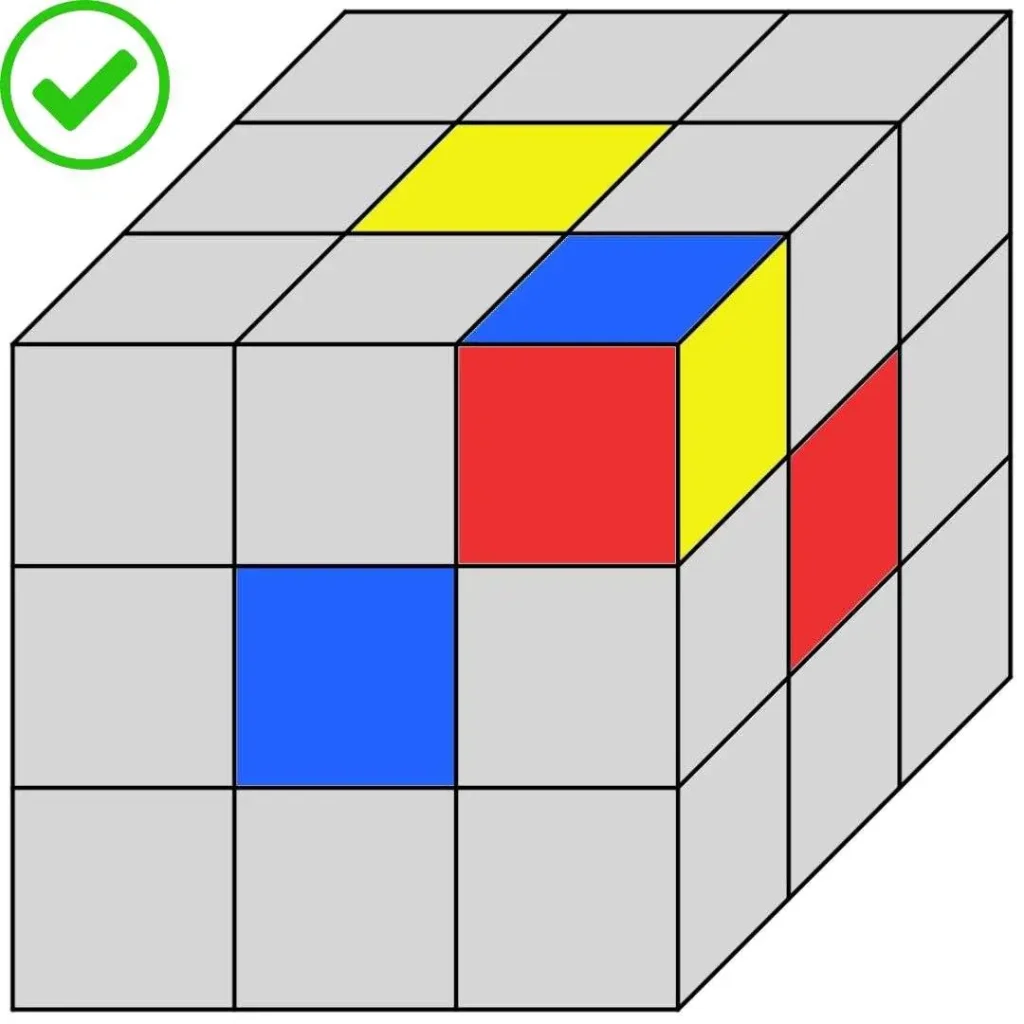
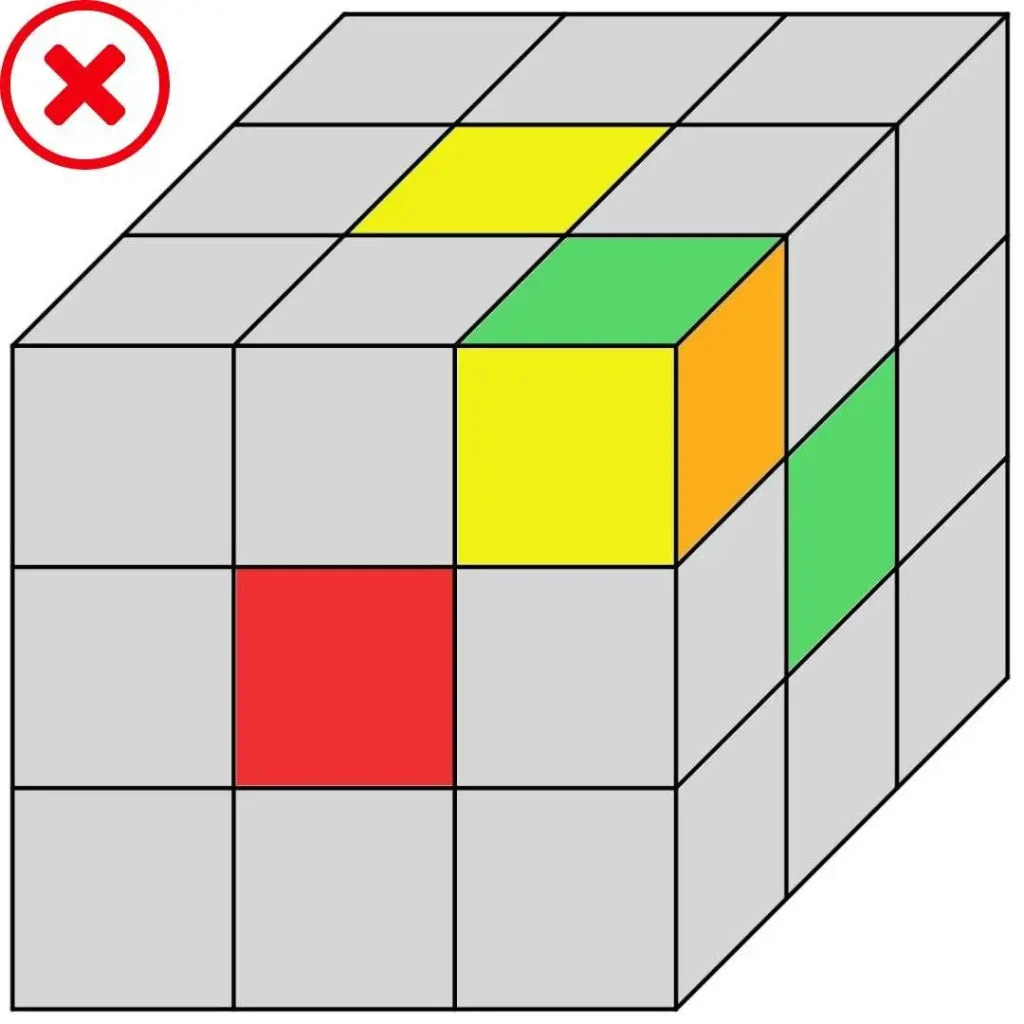
The three stickers on the corner piece should match the colours of the three adjacent faces. It does not matter if they are in the wrong order (see Figure 33.1). We will fix that in Step 8.


- Hints:
- Once you find the correct position for one corner piece, keep it in the near-right corner. The near-right corner stays fixed when we use the Cycle.
- If none of the corner pieces are in the correct position, perform the Cycle once and reassess.
The Cycle

Figure 34: The near-right corner remains fixed when we apply the Cycle
Example

Figure 35: By cycling the corners front-left —> back-right —> back-left —> front-left, we get all corner pieces to the correct positions
Step 8: Aligning the Corners of the Rubik’s Cube
- Goal: Align all corners so the yellow stickers are on the top face.
This final step requires patience and precision. Follow the six steps below using the right trigger (see Figure 36 for a reminder of the right trigger). Take your time with this step and study the example in Figure 37 first – your hard work will pay off!
- Turn the Rubik’s Cube upside down so the yellow face is on the bottom.
- Hold the Rubik’s Cube so that a yellow sticker on the wrong face is in the near-right corner.
- Apply the right trigger until the yellow sticker appears on the yellow face. Do not worry that other parts get messed up here; they will auto-correct themselves soon.
- If there is still another yellow sticker on the wrong face, turn the bottom layer until it is in the near-right corner.
- Repeat until all the yellow stickers are on the yellow face.
- I will give you the satisfaction of making the final turn for yourself.
Right trigger – viewed from below
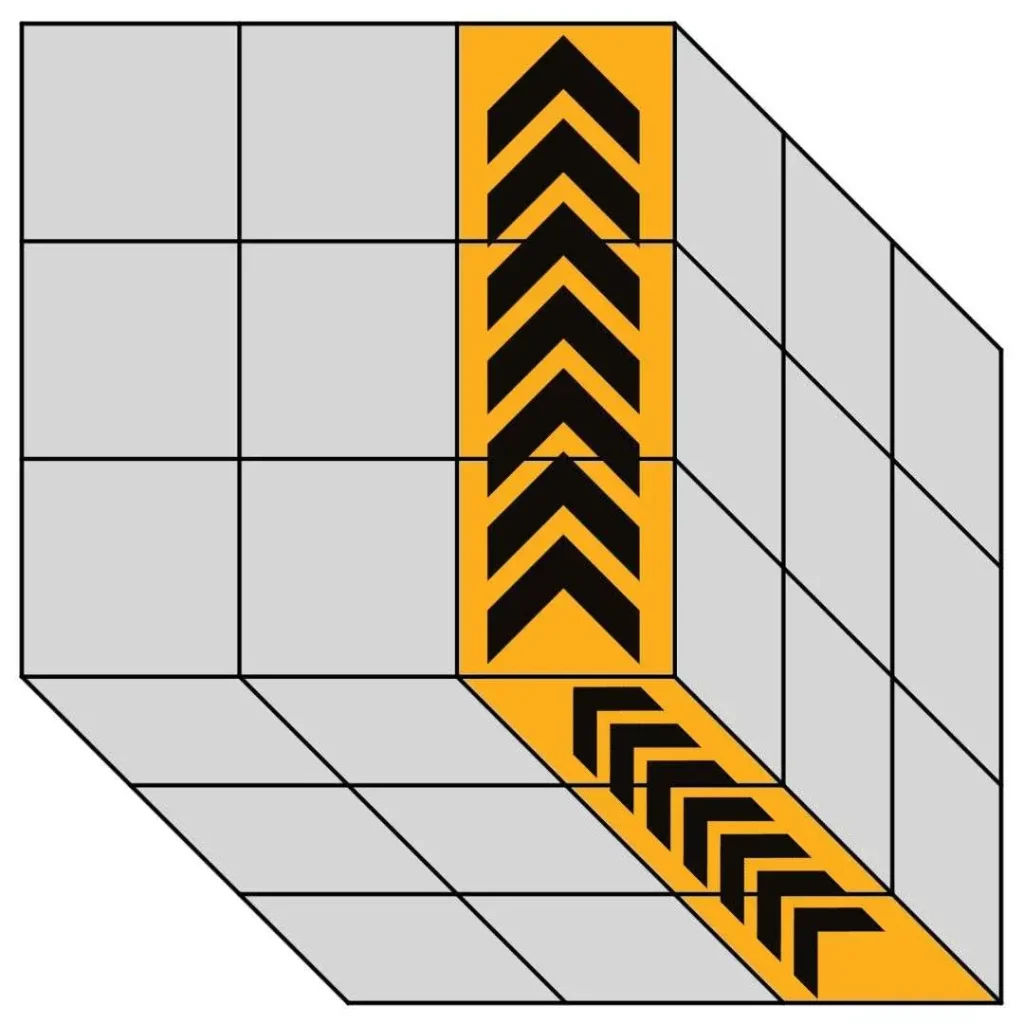
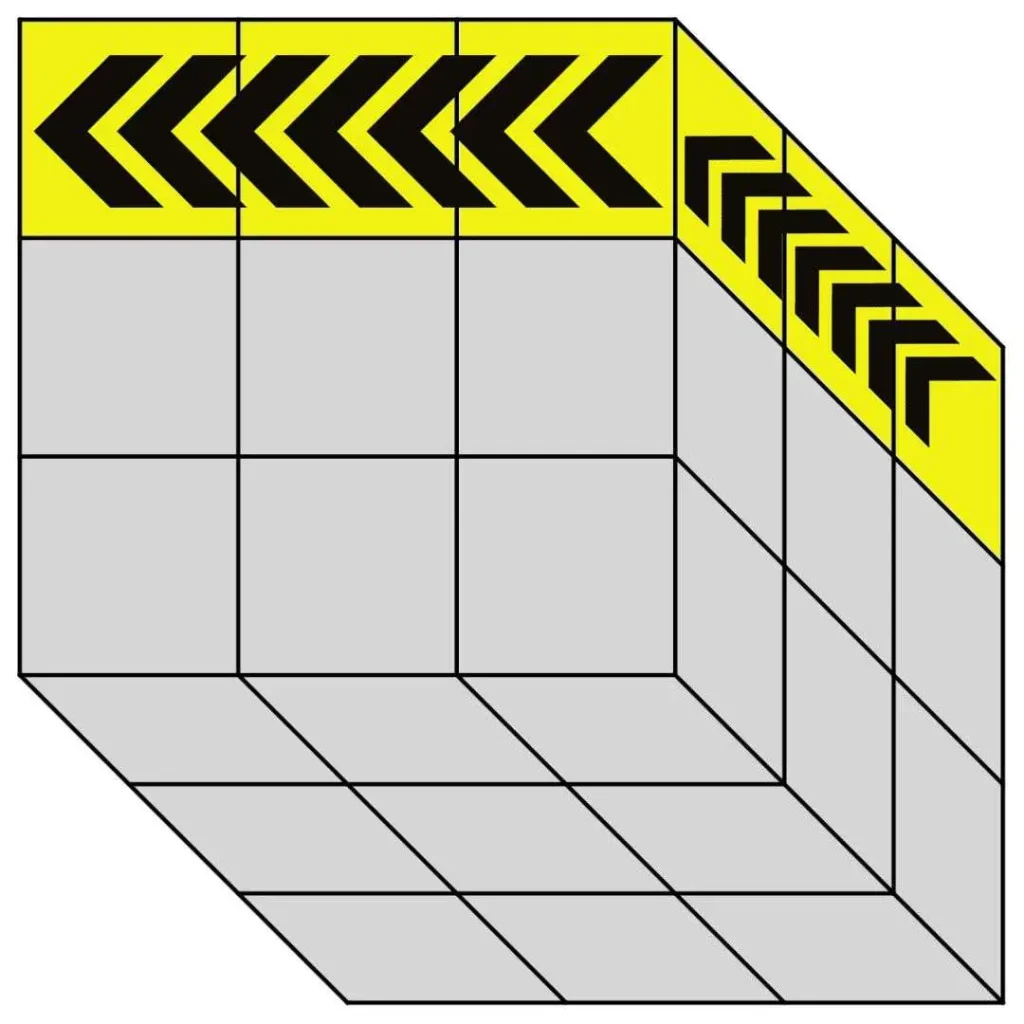
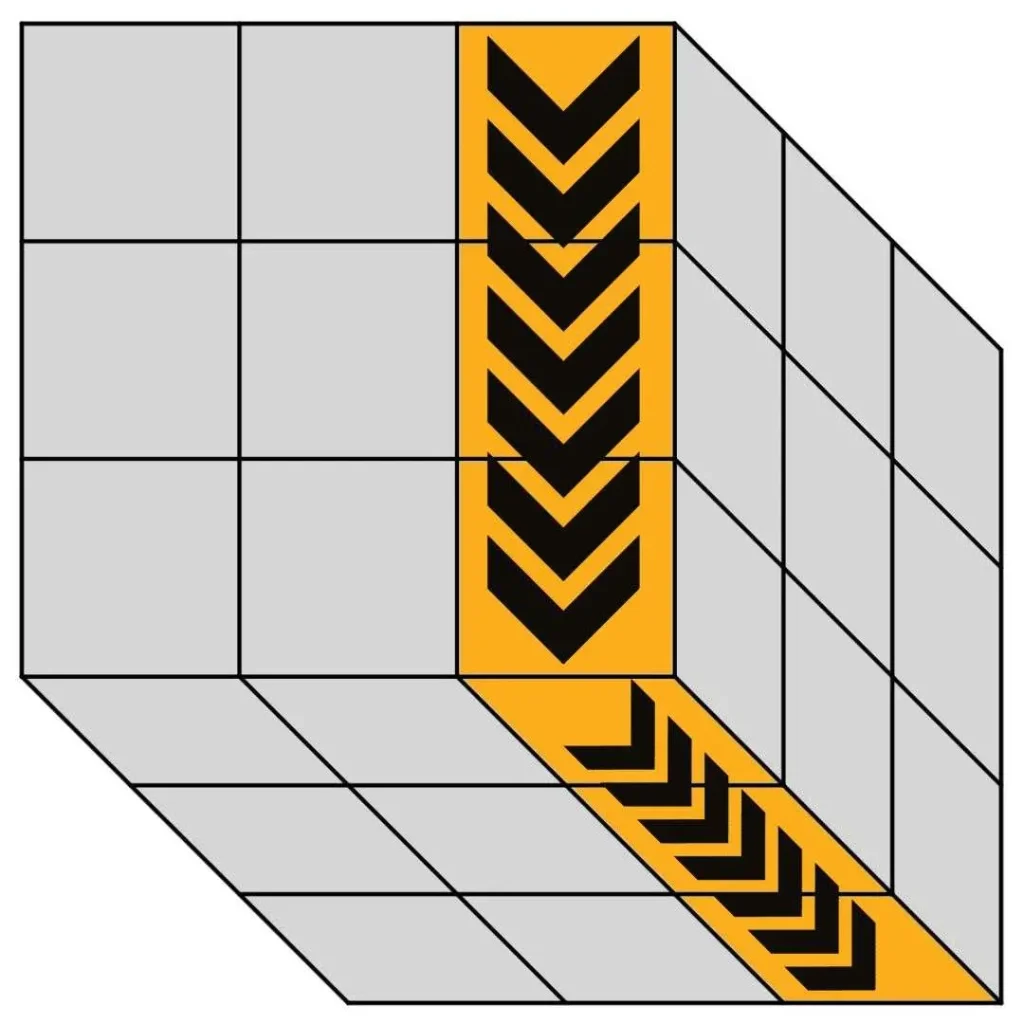

Figure 36: Right trigger viewed from below
Example


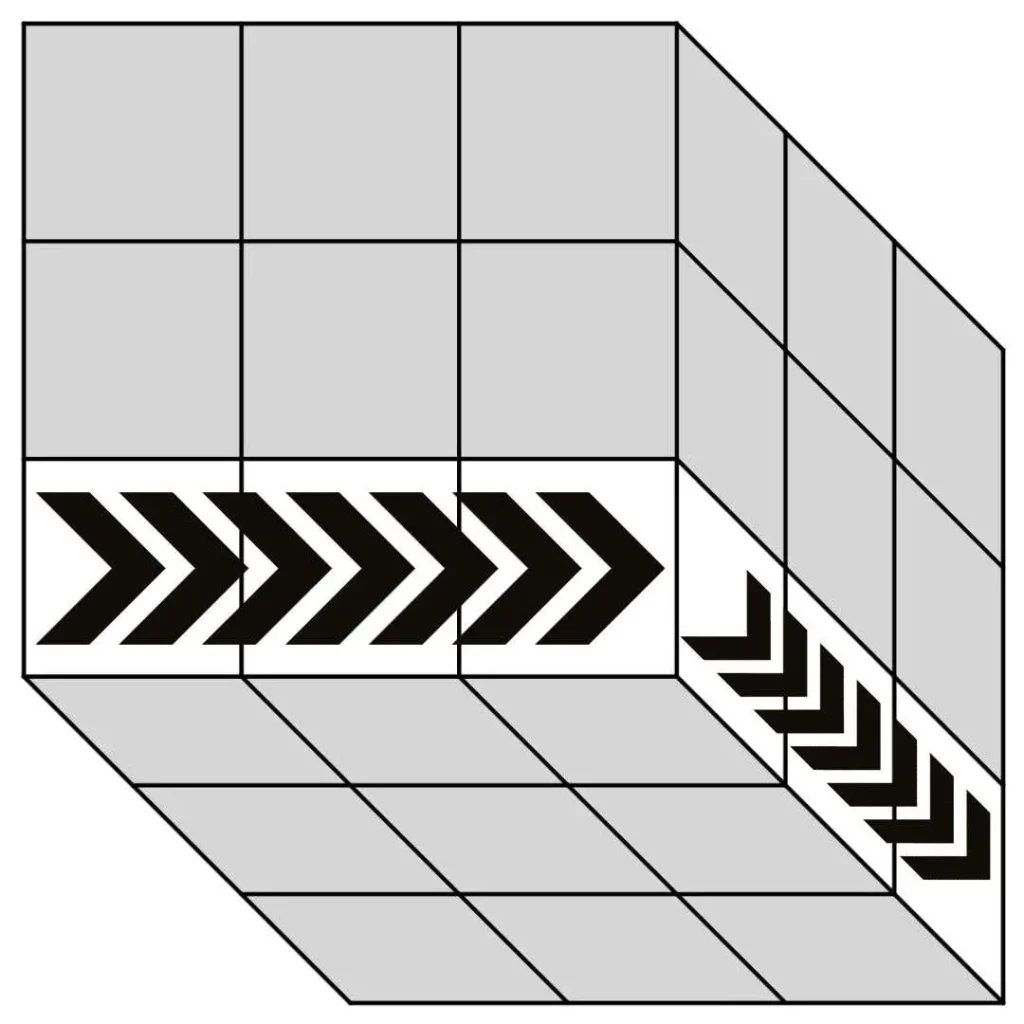


Figure 37: The near-right corner is fixed after two applications of the right trigger. Turn the bottom face until another incorrectly aligned piece is in the near-right position. Then, repeatedly apply the right trigger until it is correctly aligned.
Quiz
See what you’ve remembered by trying our Rubik’s Cube Quiz! If you need help with any answer, re-read the appropriate section.
Conclusion
Congratulations on completing the Rubik’s Cube! This journey isn’t about the solution; it’s about the fun and challenge of the puzzle. Remember, the world of Rubik’s Cube solving is vast and full of different methods and challenges to explore.
Ready for your next intellectual challenge? Memorise the steps you have learned here using mnemonics in our article How to Memorise the Rubik’s Cube!
FAQ
How long does learning how to solve a Rubik’s Cube take?
It depends on the person, but with the simple method in the article, most beginners can learn the basics within a day.
Do I need to memorise all the algorithms to solve a Rubik’s Cube?
No, beginners only need to learn a few simple algorithms broken down into manageable steps in the article. We have another article here which uses memory mnemonics to memorise the different steps.
What is the best beginner’s method to solve a Rubik’s Cube?
There are many fantastic methods available; the “best” is down to personal preference. This article presents an 8-step process, starting with creating a “daisy” and solving the cube layer by layer, which is ideal for beginners.
How can I improve my solving time?
After mastering the beginner method, you can learn more advanced techniques like CFOP (Cross, F2L, OLL, PLL) to reduce your solving time.
What are beginners’ most common mistakes when solving a Rubik’s Cube?
Common mistakes include incorrectly aligning pieces before performing algorithms and rotating the wrong layers.
What is the world record for solving a Rubik’s Cube?
The world record for solving a standard 3x3x3 cube is 3.47 seconds, set by Yusheng Du in 2018.
Can I solve a Rubik’s Cube without knowing algorithms?
While it’s possible to solve the cube with intuition, algorithms greatly simplify the process, making it faster and more efficient.
Is it easier to solve a Rubik’s Cube with specific colour patterns?
No specific colour pattern is more straightforward than another; it’s about your problem-solving method. The article’s method works regardless of the starting colours.
Why does the cube sometimes get stuck or feel stiff during solving?
This can happen if the cube is old or dirty. Lubricating the cube with a silicone-based spray can improve its performance.
Can solving a Rubik’s Cube improve my memory and problem-solving skills?
Yes! Learning algorithms and recognising patterns can enhance your memory and improve problem-solving abilities.
Are there different types of Rubik’s Cubes?
Yes, there are many variations, including 2×2, 4×4, larger cubes, and different shapes like the Pyraminx and Megaminx.